Wednesday, December 31, 2014

Sneak Peek: Cute & Colourful Cheerful Critters


Another fun stamp set in the NEW Occasions catalogue called 'Cheerful Critters'. It sure is CUTE... An oh-so-cute chick, bunny and bear stamp with some cute sentiments to fit in their signs! What could be better?! Well, I'd like a piggy too...


I coloured these cutties in with Blendabilities markers and fussy cut them out. Man, did that take a LONG time... the cutting that is, since the colouring is a cinch with Blendabilities. I cut a piece of Night of Navy cardstock and embossed it with the Zigzag embossing folder.


I just had to add some of my go-to favourite product... Baker's Twine to finish my card! I popped the little cutties on dimensionals and a little added sparkle with some dazzling details. Have a great day, see you next year :)


Stampin' Up! Supplies Used:
Stamps: Cheerful Critters
Papers: Whisper White, Night of Navy & Basic Black cardstock
Inks: Tuxedo Black Memento Ink, Daffodil Delight, Smoky Slate, Cherry Cobbler, Pumpkin Pie, Crumb Cake, Night of Navy, Old Olive Blendabilities Markers
Accessories: ZigZag Textured Impressions Embossing Folder, Whisper White Baker's Twine, Dazzling Details, Paper Snips, Stampin' Dimensionals, Stampin' Trimmer

Thanks for stopping by, happy stamping!
Beckie

Tuesday, December 30, 2014

Reflective Festive Trees

Okay, so I know that Christmas is over but I have some projects that I haven't shared yet. So, today I'm sharing THREE of the projects that I created a few weeks ago... they are some of my favourite Christmas cards that I made!! I love the festival of trees set, that's no secret... especially the tree image that I chose for the first card.


I stamped the tree three times face up, then flipped it to stamp it three times upside down. I added some snowflakes from the Many Merry Stars set from the Holiday Supplement catalogue, the 'tis the season sentiment is from the same set. The tiny snowflakes are from the Holiday Home set. To finish off the card, I added some Rhinestones and some glimmer paper.
 
 
My next card I made longer 8" X 4" - score at 4". I used Basic Black and Bermuda Bay cardstock. The trees this time I chose the filigree tree. Since the card was longer, I was able to fit 5 trees. I used the Silver Encore ink and I love the silver on the black.
 
 
 I used the Mingle All the Way - but I fussy cut around the 'Holiday Cheer' portion of the stamp set.


I was happy with how the Black and Silver version turned out, I tried with anther dark cardstock - Blackberry Bliss. I stamped the  JOY from the 'Get your Santa on' set, and fussy cut it out to make a banner in the center of my card.  
 
 
I added some Champagne glimmer stars - the champagne colour and Blackberry Bliss go nicely together. To finish the card, I added some Basic Black Baker's Twine bows to the ends of the joy banner.
 
 
I'm off to work, I have another sneak peek tomorrow featuring NEW products.
I hope you'll check back then :)
 

Stampin' Up! Supplies Used:
Stamps: Many Merry Stars, Festival of Trees, Holiday Home, Get Your Santa On, Mingle All the Way
Papers: Wild Wasabi, Bermuda Bay, Blackberry Bliss & Whisper White Cardstock, Silver glimmer paper, Champagne glimmer paper, Silver glimmer paper
Inks: Wild Wasabi, Lost Lagoon, Soft Sky, Blackberry Bliss and Bermuda Bay Classic Inks, Tuxedo Black Memento Ink, Silver Encore Metallic Ink
AccessoriesRhinestone Basic Jewels, Stampin' Trimmer, Paper Snips, Basic Black Baker's Twine, Stampin' Dimensionals, Itty Bitty Accents Punch Pack, Mini Glue Dots
 
Thanks for stopping by, happy stamping!
Beckie

Monday, December 29, 2014

Sneak Peek.... Painted Petals You are amazingly AMAZING!


Good morning, I hope you all had a great weekend. As promised yesterday, I have another sneak peek with a different stamp set from the upcoming Occasions Catalogue - which starts next week (January 6th) to share today. This time it's featuring a new stamp set called "Painted Petals". 
 
I actually got the chance to play with this set at my upline's drop-in open house the first week of December. Since demonstrator's can pre-order from upcoming catalogues (a nice perk!).  Originally, I thought it's just another flower stamp set... but I was wrong, I can admit it when I am! 


This is one of the cards I created at Jenn's place. I was so pleased with how easy it was to create pretty cards I immediately had to order a set for myself. It is available in 3 different stamp options, wood mount, clear mount or photopolymer - which is great!! It's nice to have the option of stamp type - several of the new stamp sets have the same option. 
 
 
I tried adding some ribbon or twine, but felt that it wasn't necessary.  I really love this sentiment too... "You are amazingly AMAZING". One of my favourite sentiments in a while! I hope that you like my share, have a wonderful day! I'm off to work, see you tomorrow :)


Stampin' Up! Supplies Used:
Stamps: Painted Petals
Papers: Pear Pizzazz, Wild Wasabi and Whisper White cardstock
Inks: Wild Wasabi, Pear Pizzazz, Crisp Cantaloupe, Calypso Coral, Daffodil Delight Classic Inks, Tuxedo Black Memento Ink
Accessories: Dazzling Details, Stampin' Trimmer

Thanks for stopping by, happy stamping!
Beckie

Sunday, December 28, 2014

A Forest of Beautiful Trees


Hi there! I have made so many cards with the 'Festival of Trees' stamp set - since it's really quite easy to make lovely cards in a matter of minutes. Seriously, minutes! I decided to use two of my favourite colours, Lost Lagoon and Coastal Cabana. I stamped first the basic tree shape with Coastal Cabana, then the ornament overlay with Lost Lagoon. Since the set is photopolymer, it's a easy to line up the ornaments. I punched out the trees with the tree punch (love it!). I ripped some Whisper White paper to make it look like snowy hills, I added the first layer where I tucked a few trees under the snow.


I then, added another layer, popped up on dimensionals and tucked some of the trees in the front under the snowy hills. My background layer is embossed with the Large Polka Dots and I stamped some stars using Coastal Cabana Ink. The white stars are some leftover confetti from the Confetti Stars punch... love that you can use the the leftovers! To finish I stamped "Peace, Love and Joy" at the bottom of the front tree, added some silver glimmered stars and some Dazzling Details to the snowy hills. I hope you like my share, enjoy the rest of your weekend... I'm off to work. I have another sneak peek tomorrow, I hope you'll check back to see what I've got to show you?!!
 
Stampin' Up! Supplies Used:
Stamps: Festival of Trees, Many Merry Stars
Papers: Whisper White, Coastal Cabana Cardstock, Silver Glimmer Paper
Inks: Coastal Cabana, Lost Lagoon Classic inks
Accessories: Itty Bitty Accents Punch Pack, Tree Punch, Confetti Stars Punch, Large Polka Dots Textured Impressions Embossing Folder, Dazzling Details, Stampin' Dimensionals, Stampin' Trimmer. Tombo Multi-purpose Glue
 
Thanks for stopping by, happy stamping!
Beckie

Friday, December 26, 2014

Sneak Peek! Hello Life... do more of what makes you HAPPY


Hello... I hope that you all had a nice Christmas, mine was good. We're off to see my sister in KW for our non-traditional Christmas festivities.  Hopefully, well get to sneak in a trip to the antique store!
 
I have another sneak peek today, I just love the sentiment stamp because it's so true... "do more of what makes you happy" - I firmly believe that. If you don't love what you do, you won't be happy and fulfilled and that's just no good! For me I love my therapeutic recreation job and I love being a Stampin' Up! Demonstrator too. Both are fulfilling to me, in different ways - but make me happy!!


I decided to stamp the various heart images, some are stamped off, some are not. I used Crisp Cantaloupe and Calypso Coral classic inks. I was able to make my own designer series paper with these stamps, something that I do often is make custom backgrounds with my stamps.
 
 
I covered the entire Whisper White layer with the stamped hearts before I stamped the sentiment. I layered it all onto a layer of Basic Black and a Whisper White card base. The "happy" I added some Dazzling Details to make it pop a bit more. I am very happy with how this card turned out, it screams HAPPY to me! I hope you like it, have an awesome day :)


Stampin' Up! Supplies Used:
Stamps: Hello Life
Papers: Basic Black, Whisper White and Crisp Cantaloupe cardstock
Inks: Crisp Cantaloupe, Calypso Coral Classic Inks, Tuxedo Black Memento Ink
Accessories: Itty Bitty Accents Punch Pack, Dazzling Details, Whisper White Baker's Twine, Stampin' Trimmer, Stampin' Dimensionals.
 
Thanks for stopping by, happy stamping!
Beckie


Thursday, December 25, 2014

HOLIDAY CHEER = Joy, Friendship, Peace, Love and Happiness

Well today is the BIG day, Christmas! I send very merry wishes to you and yours! I asked Santa for none of that ``white stuff``, I guess I got my wish... Although, it would be nice to have it today for the kiddos to play in. Maybe it will later?!


I have a TWO cute Santa cards to share today. I used the super cute 'Get Your Santa On' stamp set. First, I coloured Santa in with Blendabilities Markers, punched it out with the 2-1/2" Circle Punch, then using the Circles framelits to make a mat in Cherry Cobbler. I cut two 1/2" strips of designer paper from the Trim the Tree stack, I just love that paper!! It's on special in the year-end close outs for $5.09!!! I of course grabbed some! I wrapped a piece of 1/8" Silver Ribbon and tied a bow. The bow is right above the Santa so it looks like an ornament. I used the "Holiday cheer" sentiment from the 'Cheerful Tags' set, punched it out with the Large Oval and matted to the Scallop Oval. A quick, simple and easy to make card!
  
 
Next, I started with a layer of Whisper White, then stamped the fireplace image. I then stamped it again, but cut it out this time. I wanted to add some dimension to the card. I then coloured it with Blendabilities Markers before popping it up on dimensionals. I cut the Santa legs and also popped them up on dimensionals.


 I stamped and cut out another wreath image and popped that up on dimensionals... a lot of dimensionals were used! I then stamped the `JOY` star banner and stamped it a second time, but in real red. I cut the stars out and popped them up on dimensionals. This card wasn`t as easy to make as the first, but I like how it turned out. I cut a piece of Basic Black and cut an oval from the center. Finished by adding two sentiments... You better watch out, you better not pry and CHIMNEY DELIVERY. I hope you like my cards, and Merry Christmas once again :)
 
 
Enjoy the rest of the holiday season, I've got some sneak peeks coming up showcasing NEW products from the Occasions Catalogue that begins January 6, 2015. I hope you'll come back to visit me!!

Stampin' Up! Products Used:
Stamps: Get Your Santa On, Cheerful Tags
Papers: Trim the Tree Designer Series Paper, Garden Green, Whisper White, Pistachio Pudding, Cherry Cobbler, Basic Black & Wild Wasabi Cardstock
Inks: Tuxedo Black Memento ink, Smoky Slate, Daffodil Delight, Old Olive & Cherry Cobbler Blendabilities Marker Assortment, Basic Black Stampin`Write Marker
Accessories: 1/8" Silver Ribbon, 2-1/2" Circle Punch, Circles Collection Framelits Dies, Large Oval Punch, Scallop Oval Punch, Stampin' Dimensionals, Stampin' Trimmer, Paper Snips, Dazzling Details, Ovals Collection Framelits

Thanks for stopping by, happy stamping!
Beckie

Wednesday, December 24, 2014

Many Merry Glimmered Stars & Snowflakes!


Merry Christmas Eve to you! Yesterday we had Santa come to my work to take photos with my favourite senior peeps at the Retirement home. I got to hand-deliver all their gifts, while he was occupying them! It will be a very, quiet time the next few days as many will be going off to visit family and friends for the holidays. Before I head off to work today, I've got a couple cards to share with you.

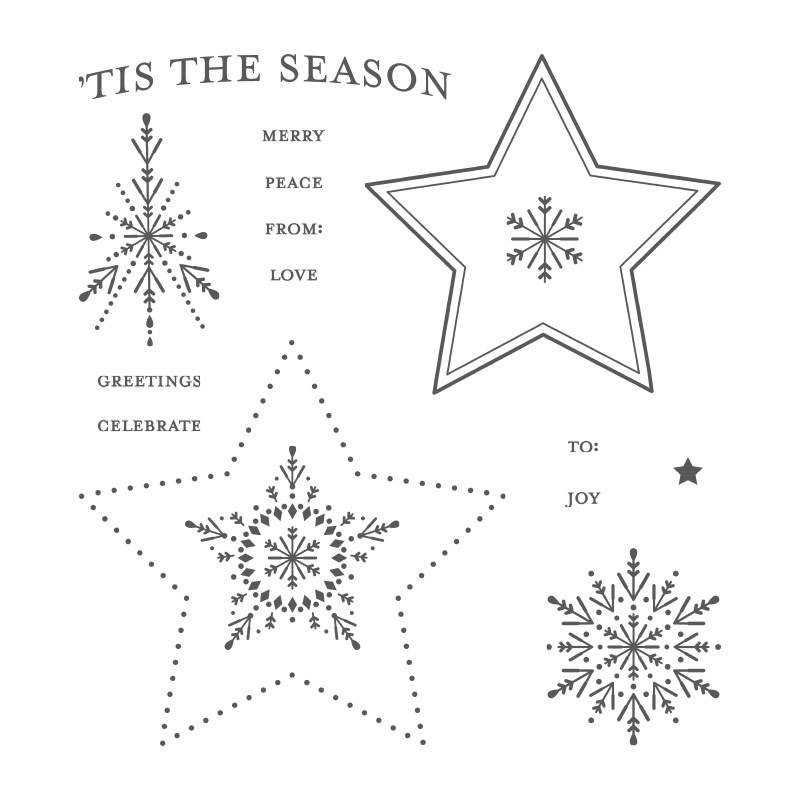
I have really enjoyed making my holiday cards this year, so many fun and fabulous stamp sets in this years Holiday catalogue (not that there isn't every year!). For today's shares I used one set from the Holiday Supplement, More Merry Stars. I'm a sucker for stars so I just had to have this one (it's in the year-end close outs now!). To make my first card I punched the end of a piece of Pool Party cardstock with the Stars confetti punch and layered a strip of Silver glimmer paper behind it so the stars are sparkly! I then embossed a piece of Lost Lagoon with the Lucky stars embossing folder, but I decided to use the de-bossed side (stars indented, rather than raised). I randomly stamped some of the sentiments from the set and the little star stamp in the empty spaces on the Lost Lagoon panel. It still wasn't enough, so I stamped the star image... so pretty and die cut it out with the stars framelits. I had to add some more sparkle so I added a piece of silver ribbon to the top of my star to look like an ornament and some Rhinestones to the corners of each of the points of the star. It's super sparkly!!


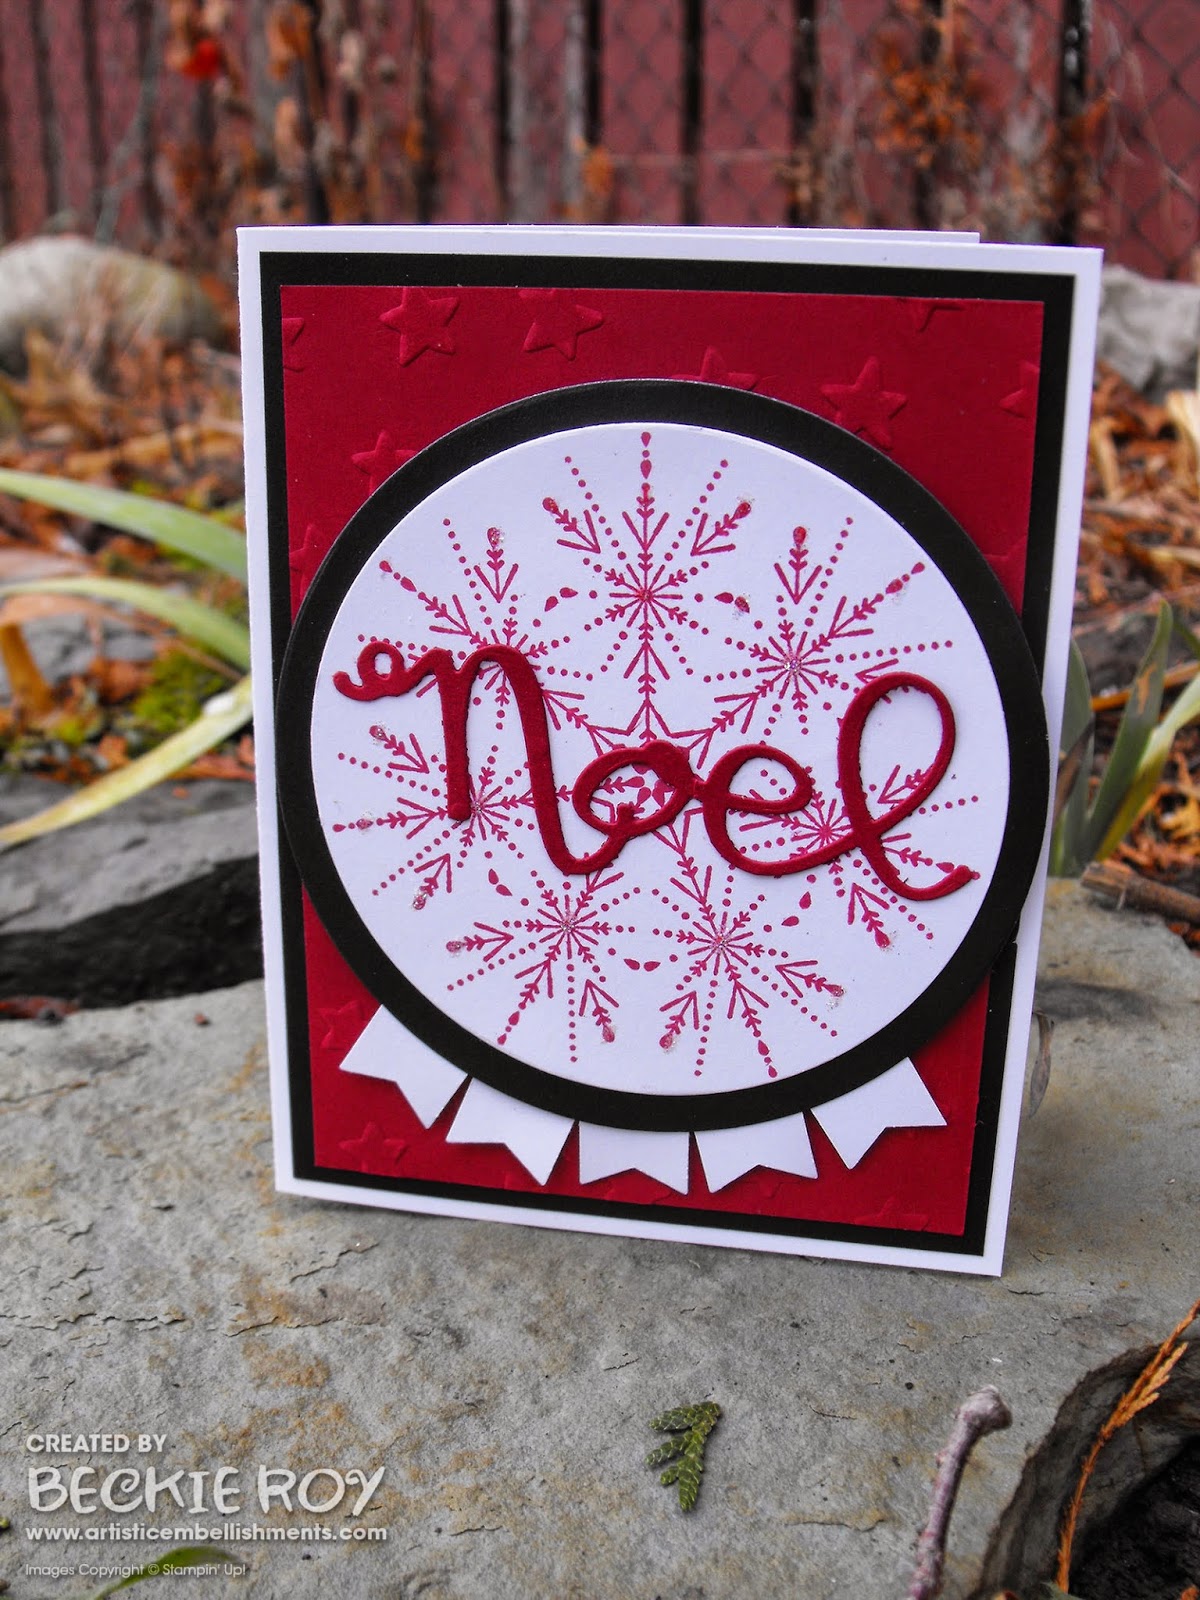
For my next card, I used the same set - but opted to use the "tree" image. It coordinates with the Tree Punch. I decided to make a snowflake. The image is stamped 7 times, and it is super easy to line up since the stamps are photopolymer. The center of the "handmade" snowflake makes a star shape, like it was meant to make pretty snowflakes! I embossed the background layer of Cherry Cobbler with the Lucky Stars embossing folder as well. I added some Dazzling Diamonds Glitter to the snowflake, although it's hard to see that in the photo. To make it simple, I diecut the snowflake with the Circles Framelits and added a bunch of banners to the bottom. After I did that, I thought it might make a pretty snowglobe - another time!


This tree stamp sure does make a stunning snowflake, don't you think so?!


Many Merry Stars is available in the Year-end Close outs for $15.69. Such a pretty set!

Stampin' Up! Supplies Used:
Stamps: Many Merry Stars
Papers: Cherry Cobbler, Whisper White, Lost Lagoon, Pool Party & Basic Black Cardstock, Silver Glimmer Paper
Inks: Cherry Cobbler & Lost Lagoon Classic Inks, Tuxedo Black Memento Ink, Silver Metallic Encore Pad
Accessories: Stars Framelits Dies, Stampin' Dimensionals, Confetti Stars Punch, Lucky Stars Textured Impressions Embossing Folder, 3/4" Circle Punch, Dazzling Diamonds Glitter, 1/8" Silver Ribbon, Stampin' Trimmer, Rhinestone Basic Jewels, Wondrous Wreath Framelits Dies

Thanks for stopping by, happy stamping!
Beckie


Tuesday, December 23, 2014

Get your Santa Stache ON!!

Can you believe it's almost here!? I can't believe how fast this year has gone by... it baffles me! It's also sad that we're going to lose some fabulously adorable Holiday stamp sets... sniff, sniff!!
 
I was colouring some of the Santa's from Get your Santa on, when the light bulb went on! How cute would this be with a big Santa head from the Santa Stache?!! Well, super cute as it turns out. Check it out............
 
 
I started by cutting a Whisper White base, with a Basic Black layer. I then embossed a Garden Green with the Stars textured impressing embossing folder. I cut a polaroid die cut, lined with a piece of Trim the Tree Designer series paper. I coloured Santa and Santa's outfit with Blendabilities then fussy cut them out. For his suit, I had to trim the arms off, then flip them... otherwise the arms would be covered by Santa's head. Santa's head is popped up on dimensionals... Santa wasn't harmed, don't worry! I added some twine and glimmer paper stars and the cute sentiment from the Get your Santa on set... you better watch out, you better not pry! I had fun making this card. I hope you like it :)
 
 
Stampin' Up! added some new items to the year-end closeouts, items up to 80%!!! Some great products available like one of my fav's the "Tee-hee-hee" stamp set!!
 
Year-end closeouts. Save on great products with up to 80% discounts! Save now!
 
CLICK HERE  to see which items are available.  
 
Stampin' Up! Supplies Used:
Stamps: Santa Stache, Get Your Santa On
Papers: Whisper White, Basic Black and Garden Green Cardstock, Silver Glimmer Paper, Trim the Tree Designer Series Paper
Inks: Tuxedo Black Memento Ink, Cherry Cobbler, Daffodil Delight Blendabilities Assortments, Blushing Bride and Basic Black Stampin' Write Markers
Accessories: Lucky Stars Textured Impressions Embossing Folder, On Film Framelits Dies, Dazzling Details, Paper Snips, Whisper White Baker's Twine, Stampin' Trimmer, Stampin' Dimensionals, Itty Bitty Accents Punch Pack
 
Thanks for stopping by, happy stamping!
Beckie

Monday, December 22, 2014

Monster Greetings to You!!

Hello, so I love Halloween ... that's no secret! If you've read any of my blog posts or know me at all, you'll know that I'm mildly obsessed! I was looking at my lovely Halloween stamps sitting on my shelf all sad that they are not being used so I took them out to play.
 
I just had to stamp my favourite little skeleton and monster from the Freaky Friends stamp set. I didn't want to make the card all depressing, so I stamped and die cut a holiday house coloured with Blendabilities, and stamped Santa and his reindeer image along with some holiday trees and snowflakes from the Holiday home set. 
 
 
I stamped, coloured and cut out some Santa hats from the Get your Santa on... to make my "monsters" festive. My sentiments are a combination of Ghoulish Greetings, Festival of Trees and one I created with the Alphabet Rotary set "MONSTER".
 
 
Who says Halloween can't be infused into Christmas? Look at the Nightmare before Christmas... one of my favourite movies, a great infusion of the two holidays. I hope you like it :)
 
 
Stampin' Up! Supplies Used:

Stamps: Freaky Friends, Holiday Home, Alphabet Rotary Stamp, Ghoulish Greetings, Festival of Trees, Get your Santa on.
Papers: Whisper White, Basic Black and Garden Green cardstock
Inks: Tuxedo Black Memento Ink, Garden Green Real Red, Soft Sky and Crushed Curry Classic Inks
Accessories: Dazzling Details, Homemade Holiday Framelits Dies, Whisper White Baker's Twine, Paper Snips, Stampin' Dimensionals Mini Glue Dots
 
Thanks for stopping by, happy stamping!
Beckie

Sunday, December 21, 2014

A Festival of Trees full of JOY and Sparkles!

Hello... I have not one, but two pretty and sparkly cards to share today. What could be better?! I can't seem to ever get tired of glittering up my projects! I was playing around with the Star Confetti Border Punch, and I saw my Tree punch and... the light bulb went off! I punched the tree over part of the border of punched stars. 
 
 
I thought it would look nice layered over a piece of gold glimmer paper... I decided to use Blackberry Bliss for my background colour, it looks so striking with the mix of gold and white. Very crisp and clean. I added a couple of strips of gold on either side of the white strip for some more sparkle.  
 
 
My background Blackberry Bliss was embossed with the "On Point" textured impressions embossing folder - since it coordinated perfectly with the tree punch. This is one of my favourite cards that I made this season!


Since I really liked how the first card turned out, so pretty and sparkly... I decided to make another but change up the colours and style a bit. I used Pacific Point and Whisper White this time with some Silver glimmer added for the sparkle. I stamped the background with the snowflake image from the Holiday home stamp set in both Pacific Point and Soft Sky classic inks. I punched a 3 trees using Silver Glimmer paper to mat under my Pacific Point Trees with the stars punched out. I tore some Whisper White cardstock to make "snow" at the bottom of my card to place my 3 trees onto. I added some Dazzling Details to make the snow glistening... it's a super sparkly card - I love it!
 
 
Here's a close up of the pretty, sparkly trees. A nice pop of silver sparkles! Well, I hope you like my share and will give this fun idea a try... enjoy the rest of your weekend, I'm off to work!! See you tomorrow with some more Christmas projects :)
 
 
Stampin' Up! Supplies Used:
Stamps: Holiday Home
Papers: Gold and Silver Glimmer Paper, Pacific Point, Whisper White and Blackberry Bliss cardstock
Inks: Pacific Point, Soft Sky Classic Inks
Accessories: Tree Punch, Confetti Stars Punch, Itty Bitty Accents Punch Pack, Dazzling Details, Mini Glue Dots, 2-1/2" Circle Punch, On Point TIEF, Wondrous Wreath Framelits Dies, Stampin' Trimmer, Stampin' Dimensionals
 
Thanks for stopping by, happy stamping!
Beckie

Saturday, December 20, 2014

Simple Holiday Boxes & Tags

Hi there... do you need some ideas for quick boxes or tags for your holiday gatherings? Well, I have some easy to create samples to share. With the Gift Box Punch board it's super easy to create boxes in a matter of minutes. I made the smallest box (a 1.75x1.75") final box. Simply follow the score lines indicated for your paper size, mine was a 6x6" square to begin with. I cut some simple layers 1/8" smaller, then some Trim the Tree designer series paper and a die cut glimmer star.
 
 
It looks so tiny far away.. well, it is pretty tiny - but oh so cute! It could hold a bunch of chocolates or some earrings. A pretty package, if I do say myself!


I used the Christmas Tagables Photopolymer stamp set. This set is available online and not shown in any catalogue. I got it last year - it's got some really great sayings perfect for tags (item # 134623). A couple of them can be perfectly punched out with the Mr. Hexagon punch too... no coincidence why I like this set!?
 
This time I've got a wine tag... it could be used for a sparkling cider. It jazzes up your gift a little bit. I cut a strip of Cherry Cobbler cardstock, 3" wide and you could use many different lengths depending on the size of bottle. I scored it at 1-1/2" and punched a 1-3/8" circle in the center (I just eyeballed it). Then decorate as desired... these really take no time at all to make a bunch for your holiday gift giving.
 
 
This type of box/bag, not sure which category it falls under is so simple to make and can be done in a variety of sizes. I've been making these for many years, since they are so simple and need no measurements or cutting if you didn't want to. Super easy. For my samples, I chose to make a 6-1/2"x4-1/2" size, since that is the size of the paper in the Trim the Tree designer series paper stack. I love, love those paper stacks - so perfect for many things!!! All you do to make these "sour cream containers" as they are called is to add some sticky strip adhesive to one end. Make a tube, then put another piece in the opening of one end to seal the bottom. I leave the top open to put my treats in (in this case some yummy peppermint chocolates!) but I punch a hole and tie closed with a ribbon. For the top opening, you want to seal your container the opposite way of the bottom. I added a simple 2" circle tag using the Mingle All the Way stamp. Very simple to mass produce a bunch of these adorable boxes!!!


I hope you have enjoyed my shares today, and will try to make some of these cuties for yourself - they are super easy... I promise. Have a super Saturday, I'm off to work!
 
Stampin' Up! Supplies Used:
Stamps: Mingle All the Way, Making Spirits Bright, Christmas Tagables
Papers: Trim the Tree DSP, Garden Green, Cherry Cobbler, Pear Pizzazz, Old Olive & Whisper White Cardstocks, Silver and Red Glimmer Papers
Inks: Tuxedo Black Memento Ink, Garden Green Classic Ink, Cherry Cobbler, Coastal Cabana, Old Olive, Smoky Slate and Daffodil Delight Blendabilities Marker Assortments
Accessories: Sticky Strip, Gift Box Punch Board, 2" Circle Punch, 2-1/2" Circle Punch, Rhinestone Basic Jewels, Itty Bitty Accents Punch Pack, Banners Framelits Dies, Labels Collection Framelits Dies, Stampin' Dimensionals, Stars Framelits Dies, Silver Satin Ribbon,1/8" Gold Ribbon, Real Red 3/8" Satin Woven Ribbn, Stampin' Trimmer


Thanks for stopping by, happy stamping!
Beckie

Friday, December 19, 2014

Homemade Holiday Candy Santa Jelly Bean Jars!

Happy Friday!!! I have another fun share for you... it took no time at all to whip up a bunch of these cute little guys! Perfect for little hostess gifts, stocking stuffers or nice gifts for dinner guests. I bought these cute little plastic jars from the dollar store, they are so perfect for these adorable Santa's!
  
 
I cut a 3" strip of Real Red Cardstock, cut a 3/4" wide piece of Whisper White and a 1/2" strip for his belt. The buckle is made using the Petite Curly Label Punch and for the center I had some square jewels. I added a 1-3/8" punched circle to the top and a pompom. I added some fun trim to one. To finish I wrapped some Whisper White Baker's Twine around the jar and a cute tag. I filled the jars with Red & Green jelly beans! Cute and festive gifts to give. I hope you like my share, have super day!
 
Stampin' Up! Supplies Used:
Stamps: Num Num
Papers: Real Red, Basic Black, Whisper White Cardstocks, Gold & Silver Glimmer Papers
Inks: Tuxedo Black Memento Ink
Accessories: 1-3/8" Circle Punch, Petite Curly Label Punch, Extra Large Oval Punch, Whisper White Baker's Twine, Real Red 3/8" Satin Woven Ribbon, Stampin' Trimmer
Other: Glue Gun, Hot Glue Sticks, Sparkly Trim, Pompom's, Square Metallic Rhinestones
 
Thanks for stopping by, happy stamping!
Beckie


Thursday, December 18, 2014

Sneak peek... Sheltering Tree is a stunner!

So, today I have a sneak peek for you of one of the NEW sets available for purchase starting on January 6th!! It's called 'Sheltering Tree'. Let me say how pretty this set is - it's one of the best sets that I've seen for a while and it would work for so many occasions, plus feminine and masculine cards! When I designed this card I wanted to avoid all the "white stuff" that's been falling outside by creating a spring themed card. I love the spring, I wish it was here instead of winter... but it can be spring in my craft room!
 
 
I started by stamping two trees using Early Espresso ink. I then made my grass hills with Pear Pizzazz, Wild Wasabi and Old Olive inks, then added some pretty blossoms with Calypso Coral, Crisp Cantaloupe and some hints of green with Pear Pizzazz peeking through. I added a swing to one of my trees and a sentiment thinking of you to the bottom and finished by adding some Dazzling Details glitter to my hilly grass and blossoms!
 
 
Can you believe there are no layers? No dimensionals?
 
 
Isn't it pretty?!? I love how it turned out, I hope you like it too!
 
Stampin' Up! Supplies Used:
Stamps: Sheltering Tree
Papers: Whisper White & Wild Wasabi Cardstocks
Inks: Wild Wasabi, Pear Pizzazz, Old Olive, Calypso Coral, Crisp Cantaloupe, Early Espresso and Soft Sky Classic Inks, Black Memento Ink
Accessories: Dazzling Details, Stampin' Trimmer, Sponge Dauber
 
Thanks for stopping by, happy stamping!
Beckie

Wednesday, December 17, 2014

Fun & Festive Holiday Tags!

Hi there... I have some fun tags to share today using a variety of products from the Holiday catalogue! The first one is featuring the 'Santa Stache' stamp set. I just love this set, it was on my first order when the catalogue became available to order. I'm a sucker for humourous cards - what can I say?!!
 
I started by stamping, then fussy cutting this cute Santa out. I could have left his beard white, but I decided to colour it with Smoky Slate. I cut a 2" X 3" strip of Whisper White and punched the top with the Scallop tag topper punch. I took a piece of White organza ribbon, and coloured it with one of my Cherry Cobbler Blendabilities markers - yes, you can colour ribbon! How great is that to perfectly coordinate!! I tied a piece of Gold Baker's Twine around the base of the ribbon to connect them together to the tag - then added a strip of Garden Green cardstock with one of the stamped sentiments from the same set, some Gold Glimmer paper and a strip of Trim the Tree Designer Series Paper. I added the cute Santa with a Dimensional, a perfect addition to any gift!
 
 
The second tag, I saw one on Pinterest and it was just so stinkin' cute I had to make some for myself. I used the 'Gift Bow Bigz Die', the largest piece for his mustache, the tails for his beard. His face is made with the Extra Large Oval punch, his nose is punched with the 1/2" circle. I made the hat by making a triangle with my paper trimmer, then adding a strip of white for the trim... I added some googly eyes for added whimsy! I think he's just adorable, don't you??!


Third is a MERRY tag... very simple to mass produce a bunch of these babies!! I used the notetag punch and Lost Lagoon cardstock for my base. The MERRY is from the Cheerful Tags set, punched out with the Large Oval and matted onto a piece of Coastal Cabana punched with the Scalloped Oval. I added some 1/8" Gold Ribbon and Gold Glimmer paper for some sparkle!


Fourth I have a Merry Little Wish... another simple tag or embellishment for a card. I stamped a tree image from Festival of Trees, punched out around the image with the 2-1/2" Circle. Then punched a tree out of Baked Brown Sugar cardstock, then punched a 2-1/2" Circle around the tree. I punched a hole a the top of the back piece to tie my twine through, then added dimensionals to the Brown sugar piece so the stamped image is inset. Then stamped the sentiment, punched with the word window and matted to the modern label. Added a glimmer star and some sequins to finish! Cute :)


Lastly, I cut a 2" strip of Blackberry Bliss and using the Angle tag topper to cut the top. I put a piece of Silver Satin ribbon through the top and tied some white twine around it. I cut a layer of designer series paper from the Moonlight stack, stamped the sentiment from the Wondrous Wreath set and punched it out with the 2" circle punch. I made a silver glimmer star frame as a mat behind the sentiment. To add another 'pop' of colour, I punched a Blackberry Bliss tree out! A nice topper for a gift!


I hope you liked my tags share, and be sure to check back tomorrow for a sneak peek project from the upcoming Occasions catalogue!!
 
 
Stampin' Up! Supplies Used:
StampsSanta Stache, Cheerful Tags, Festival of Trees, Wondrous Wreath
Papers: Trim the Tree DSP, Moonlight DSP, Whisper White, Lost Lagoon, Blackberry Bliss, Coastal Cabana, Baked Brown Sugar, Blushing Bride, Real Red, Garden Green cardstock, Gold & Silver Glimmer Papers
Inks: Tuxedo Black Memento Ink, Coastal Cabana, Baked Brown Sugar,  & Lost Lagoon Classic Inks, Smoky Slate and Cherry Cobbler Assortment of Blendabilities.
Accessories: Scallop Tag Topper Punch, Angled Tag Topper Punch, Tree Punch, Star Framelits Dies, 2-1/2" Circle Punch, 2" Circle Punch, 1/2" Circle Punch, Extra Large Oval Punch, Itty Bitty Accents Punch Pack, Word Window Punch, Modern Label Punch, Large Oval Punch, Scallop Oval Punch, Note Tag Punch, Gift Bow Bigz Die, Silver Satin Ribbon, 1/8" Silver Ribbon, Whisper White Baker's Twine, White Organza Ribbon, Real Red Ink Refill, Spritzer, Gold Baker's Twine, In colour Sequin Assortment, Frosted Sequins, Linen Thread, Stampin' Dimensionals, Stampin' Trimmer, Mini Glue Dots, 1/16" Handheld Punch
 
Thanks for stopping by, happy stamping!
Beckie


LinkWithin

Related Posts Plugin for WordPress, Blogger...