Wednesday, September 30, 2015

Embellished Ornaments: Black, White and a Splash of Vanilla!

Today, I have a holiday card to share. Featuring a bunch of new products. I started with a Whisper White base and a layer of Basic Black. Who says a Christmas card can't have black?! I think it's quite elegant. I cut a Whisper White layer 1/8" smaller thank the black one and stamped the pine sprig and pine cone image from Wonderland with Archival Black ink. I love making my own designer series paper and it's so simple to do!


For my next addition, I die cut using the Lots of Labels Framelits Dies and Basic Black card stock again. I centered it onto my stamped layer. Then the focal point, the beautiful ornament from Embellished Ornaments. 


It's a very subtle difference, but I actually stamped onto Very Vanilla and not Whisper White. I used Versamark and Black Embossing Powder. Heat set it before die cutting with the coordinating framelits dies. The embossed ornament really adds a nice look to this card. I went a step further and added some of the Winter Wonderland Designer Vellum. This vellum is gorgeous. I chose my favourite design but instead of using the gold side, flipped it to the reverse side and used the silver. It's more subtle than the gold but that was what I was going for. 


I added the top to the ornament with Silver Glimmer Paper and a piece of Very Vanilla Thick Baker's Twine tied into a bow. The Peace sentiment is die cut using the Christmas Greetings Thinlits Dies using Black Glimmer Paper. I can't say enough how much I love this black glimmer paper... I love, love, love it!!!!!!!!!!!!!!! I adhered it to the vellum with the Fine Tip Glue Pen. Another love it product!! I hope you like my card, have a great day! 


Thanks for stopping by, happy stamping!
Beckie

Stampin' Up! Supplies Used:
Stamps: Wonderland, Embellished Ornaments
Papers: Whisper White, Basic Black and Very Vanilla Card stock; Winter Wonderland Designer Vellum; Black & Silver Glimmer Paper
Inks: Versamark; Basic Black Archival Ink
Accessories: Black Embossing Powder, Heat Tool, Christmas Greetings Thinlits Dies, Delicate Ornaments Thinlits Dies, Big Shot, Stampin' Dimensionals, Lots of Labels Framelits Dies, Fine-Tip Glue Pen, Very Vanilla Thick Baker's Twine

Tuesday, September 29, 2015

Howl-O-Ween Treat + Sea Street all Punked Out!

Hello... sorry for the long gap in between posts - it's been a crazy, hectic last few weeks! Anyhoo, I've got a fun Easel Card to share with you today. I was playing around with my new toys (i.e. stamps) and the fabulously awesome new skull image from Howl-o-ween Treat in the Holiday Catalogue. I am mildly obsessed with skulls... errrrrrrr, I mean COMPLETELY! I had the Sea Street stamp set from the Annual Stampin' Up! Catalogue on my desk and the light bulb went off... I can make a punk rock skull!  My music of choice is punk rock, hardcore, hard rock, metal... basically I like LOUD music! I decided  to make my skull have some lovely Blackberry Bliss coloured hair. 


He sure can rock that purple hair... it's actually the octopus from the Sea Street set only it's turned upside down. Cute, eh!? To make my card have a grunged out look - I decided to distress the edges of my card stock with the edge of my paper snips. 


I chose to use Blackberry Bliss, Old Olive and Daffodil Delight, Mossy Meadow, Basic Black and some Whisper White Card stock layers. 


I added a Project Life Grid card in the mix also, and added some direct to paper stamping with my Blackberry Bliss Classic Stampin' Pad. I also used the Decorative Mask "hearts & stars" to make some stars on the Blackberry layer and added some Spiral punches to the left side. 


To make it even more punked out... I just had to add some staples and stars. For the stars I used the awesome Black Glimmer paper for a bit of sparkle! I added the sentiment using the Alphabet Rotary stamp. Lastly, a bow made with some strands of Very Vanilla Thick Baker's Twine!! 


Since I made an easel card, I needed to have something on the inside to prop up the front of the card, so I added some strips of coordinating card stock and another glimmer star, some Designer Series Paper and a sentiment stamped with the Rotary stamp again to say "thanks". I'm pleased with how my vision came to light, what do you think??! Have a rockin' day! 

:

Thanks for stopping by, happy stamping!
Beckie

Stampin' Up! Supplies Used:

Stamps: Howl-o-ween Treat, Sea Street, Alphabet Rotary
Inks: Basic Black Archival Ink, Blackberry Bliss Classic Ink
Papers: Old Olive, Mossy Meadow, Basic Black, Blackberry Bliss, Whisper White and Daffodil Delight Card stock; Winter Wonderland Designer Vellum; Winter Wonderland Specialty Designer Series Paper; Black Glimmer Paper; Project Life Grid Paper
Accessories: Handheld Stapler & Staples, Very Vanilla Thick Baker's Twine, Spiral Border Punch, 1/2" Circle Punch, Hearts & Stars Decorative Mask, Sponge Daubers, Itty Bitty Accents Punch Pack, Mini Glue Dots, Stampin' Dimensionals, Paper Snips, Boo to You Framelits Dies, Big Shot

Wednesday, September 23, 2015

A Cozy Christmas "Build your own snow globe"!!

Hi there, what a gorgeous fall day it is today. Ironically enough, I've got a Christmas share today! I was playing around with some new stamps from the Holiday Catalogue - I stamped the cottage winter scene from Cozy Christmas and checked to see if it fit in the 1-3/4" Circle punch... and it did! I really wanted to make a snow globe with the circle I'd punched out. 


I just happened to have the Lots of Labels Framelits Dies on my desk and some silver glimmer paper. I die cut the third smallest to get the base for my globe. It still needed a little something, so I added a second punched circle using the 2" Circle Punch. I matted it behind the globe for some added dimension. 


The background was stamped with Soft Sky Classic Ink onto Soft Sky Card stock with Flurry of Wishes. I just love the stenciled look to the snowflakes in this set! I decided to colour the scene inside my globe with Crushed Curry and Always Artichoke Stampin' Write Markers with some snow using the Chalk Marker. 


I stamped a few little snowflakes using A Little Something, only on the snow globe portion. The sentiment is from the hostess set Six Sayings. I love scripted fonts paired with type - adds a nice contrast. 


For some final touches, I added a Vintage Faceted Button with Silver Cording Trim tied to make a shiny bow .... I added some curly loops with my ribbon for a nice touch and a few Rhinestone Basic Jewels to the center of the snowflakes in the background! I hope you like my card, enjoy this beautiful day :) 


*Updated*

I made a different snow globe to show how it is assembled. One 2" Circle, one 1-3/4" Circle and the 3rd smallest Lots of Labels Framelits. Super easy and super cute! 


Thanks for stopping by, happy stamping!
Beckie


Tuesday, September 22, 2015

Among the Branches: Showcasing some Fabulous Fall Colours

Hello, I don't know about you? But, Fall is my favourite season of the year. I love the crispness in the air, the beautiful colours the leaves turn in autumn. The rusts, reds, oranges, yellows... some of my favourite colours for all year and they are all on display for our visual enjoyment. I pulled out my Among the branches stamp set and played a bit last week. I started with branch, which I made into a tree base. I stamped some of my favourite colours, Cajun Craze, Mossy Meadow, Tangelo Twist, Real Red and Hello Honey to create my kaleidoscope of fall colours! 


After the initial leaves were stamped, I felt it needed something more - so I added some more leaves... but different leaves from the A Little Something stamp set (bundles with the Square Pillow Box Dies). I added a asymmetrical banner across the center and adhered a sentiment from Among the branches. My card base is Cajun Craze and layers of Early Espresso and Very Vanilla. I hope you like my card, enjoy fall! 


Thanks for stopping by, happy stamping!
Beckie

Sunday, September 20, 2015

Reflecting with Lovely as a Tree


I shared another card using the Reflection Technique HERE a while back. This was another card I made while playing around with this technique for a class. There are so many possibilities with this technique. I used a different tree this time, and stepped it up slightly different as well. 


I coloured the stamp with Mossy Meadow and Early Espresso inks before stamping. I then sponged Mossy Meadow onto the tree image to fill in the white spaces and I coloured the trunk with a Soft Suiede Stampin' Write Marker. I sponged different colours, I used Soft Sky, Pacific Point and Mossy Meadow inks.  The sentiment from Sassy Salutations is stamped with the new Archival Basic Black ink onto Vellum Card stock. Yes, Archival inks are permanent and can be stamped on vellum, window sheets and much more. I love this new black ink, the stamped images are so crisp and clean. Definitely worth the wait. I hope you like it, have a great day! 


Thanks for stopping by, happy stamping!
Beckie


Stampin' Up! Supplies Used:
Built for Free Using: My Stampin Blog

Friday, September 18, 2015

Fry Box Die: Howl-O-Ween Treat 5-sided Box!

Hello, I sat down trying to think "outside the box" with the Fry Box Big Shot Die. I really wanted to make a box large enough to fit some popcorn - since I make a lot of flavoured popcorn for gifts. I started by cutting 5 of the die cuts. 


I cut the smaller portion off, keeping only the back portion of the die cut. You can save the smaller one's for another project! I cut off 1/2 the tab on the bottom and scored where the lines the die makes. Because the die scores on a curve, you have to score again to get the box to sit properly. 


Then you can assemble the box by attaching the side flaps to the next piece until all 5 are attached. Tip: I did cut the tabs in half so they were not so thick and adhered them to the sides of the box for a clean finish. You can see the score line I made below - this way before I cut down the tabs on the sides. 


I die cut a circle with the Circles Collection Framelits Dies to make the base. I lined up the box onto the circle and drew a pencil line. After I had the lines, I scored the lines and added adhesive to attach the box to the bottom. I added some simple decorations with a Halloween theme, Happy Hauntings Designer Series Paper, Black Glimmer Paper, Howl-o-ween Treat stamps and Boo to You Framelits Dies. Once the score lines were made, just slide the base through the box and stick to the edges to complete the box assembly. 


I'm pleased with how this box turned out, especially on my first attempt. Once the idea is worked out - the box is really quite simple to construct. It holds a lot of treats and a fair sized bag of delicious popcorn! I hope you like it, if you have any questions - feel free to leave me a comment! Have a great day! 


Thanks for stopping by, happy stamping!
Beckie


Stampin' Up! Supplies Used:
Built for Free Using: My Stampin Blog

Thursday, September 17, 2015

Festive Flower all glittery

Who doesn't love a paper punch? I'm obsessed with punches, so when I first saw the Festive Flower Builder Punch I knew I had to have it. I made a super glittery flower with Black and Silver glimmer paper. I punched 8 of the largest and medium black petal and 8 of the largest and medium silver petal. 


Then 2 of each colour for the double petal and 2 of the center of the flower. I added some Silver Cording Trim and a Rhinestone to finish it off. I'm excited to play some more with this fun punch, great for adding some fun flowers to cards, gift packaging and much more! Have a great day :)


Thanks for stopping by, happy stamping!
Beckie

Stampin' Up! Supplies Used:
Built for Free Using: My Stampin Blog

Tuesday, September 15, 2015

Into the Woods Bookmarks

Good Morning! I've got a busy day ahead of me. One day off work, but I'm heading down to help my Dad with some home renovations. It's sure to be a busy day - good thing I like organizing?! My share today is super quick and easy to make... I love making bookmarks or catalogue page markers... whichever! It's also a fun way to show off Stampin' Up!s fabulous designer series papers. For this project, I used Into the Woods DSP. It features some of my favourite colours, the fall is my favourite season so this paper is right up my alley and it was hand painted too, which I love. I used the Scallop Tag Topper Punch for the base of the book/page marker. Cut 1/8" smaller to make the DSP layer. 


Since the pattern I chose has only Rich Razzleberry in it, I accented it with the coordinating Into the Woods 3/8" Cotton Ribbon. LOVE IT!! Paired with some Basic Black Baker's Twine. The sentiment is from the A Little Something stamp set that you can bundle with the Square Pillow box that I'm slightly obsessed with ;) Very simple to make a whole bunch of these in no time! I hope you like them, enjoy this beautiful sunny day!!! 


Thanks for stopping by, happy stamping!
Beckie

Stampin' Up! Supplies Used:
Into the Woods Designer Series Paper
Into the Woods 3/8" Cotton Ribbon
Basic Black Baker's Twine
Basic Black and Rich Razzleberry Card stock
Rich Razzleberry Classic Ink
Scallop Tag Topper Punch
2" Circle Punch
2-3/8" Scallop Circle Punch
1-3/8" Circle Punch
Label Bracket Punch
A Little Something Stamp Set
Stampin' Dimensionals
Stampin' Trimmer

Monday, September 14, 2015

Autumn Wishes with Woodland Texture

Hello, I'm sharing one of the projects recently made for one of my classes. It features a bunch of new stuff from the Holiday Catalogue that launched September 1, 2015. New stamp set, new designer series paper, new ribbon and new embossing folder.  


I embossed a piece of Very Vanilla and added some Early Espresso colour to the trees with a brayer. I then added some colourful fall leaves with Tangelo Twist, Hello Honey and Mossy Meadow Classic Inks.


The new Into the Woods Cotton Ribbon is so soft, I decided to fray the ends with a paper piercing tool. The sentiment Autumn Wishes & Tasty Dishes is from the same stamp set as the leaves - die cut with the Circles Collection Framelits Dies and matted onto a 2" Tangelo Twist punched circle.


I used the woodgrain pattern from the Into the Woods Designer Series Paper to add some interest to the bottom of the card front. I added some fussy cut acorns, also from the Into the Woods DSP. I hope you like my card, have a beautiful day :)


Thanks for stopping by, happy stamping!
Beckie

Stampin' Up! Supplies Used:
Built for Free Using: My Stampin Blog

Friday, September 11, 2015

Wonderland is WONDERFUL!

Okay, so I've taken a small break from Halloween to share some Christmas project ideas. I am totally enamored with the stamp set Wonderland. Now, I know that Stampin' Up! already has several stamp sets with tree images, but there was something about this set that I was drawn to. The samples in the catalogue are so gorgeous as well. This set kept popping up to me, so without much hesitation I ordered it and am in love. For my card I stamped the tree image a few times stamping off at times too for some slight variance in colouring onto a piece of Mint Macaron Card stock. 


I cut a base for my card with Mint Macaron also, with a Crumb Cake layer and a piece of the stunning Winter Wonderland Designer Vellum. The gold really gives an elegant pop to this card (or any project!). I die cut the Hearth & Home Thinlits Dies for the window and window ledge for my card. 


I went with Early Espresso card stock for more contrast against the lighter colours on my base - and the trees are also stamped with Early Espresso. I popped the window ledge up on dimensionals.  


For one last finishing touch I added asnowflake from the Snowflake Elements - these laser cut wooden snowflakes add an nice touch to any project - I tied a bow of Gold Cording Trim through a Vintage Faceted Button to add even more sophistication. I opted to leave a sentiment off the front of the card, it just looked better without one. I hope you like it, have a wonderfully beautiful day :) 


Thanks for stopping by, happy stamping! 
Beckie

Stampin' Up! Supplies Used:

Built for Free Using: My Stampin Blog

Thursday, September 10, 2015

Haunted Pillow Box

I've got one more box made with the Square Pillow Box Thinits Dies.  This box is one we made at a recent class. Since most people don't send Halloween cards, I decided to make a box to share some of the new products! 


I used a base of Cucumber Crush and Basic Black. To add some interest to the Cucumber Crush on the front - I took the new Archival Black ink pad and randomly stamped it onto the entire layer. It adds a nice look and is perfect for Halloween. 


I added a die cut made using the Sleigh Ride Edgelits Dies. Probably my favourite edgelits thus far. I used the houses, since they remind me of haunted houses. I added some strips of Happy Hauntings Washi Tape for a punch of colour, and half of one of the Spiderweb Doilies. I wrapped some Gold Cording Trim and the stamp is from Sweet Hauntings, I stamped it twice - once on Blackberry Bliss and once on Cucumber Crush. I hope you like it, have a great day!!


Thanks for stopping by, happy stamping!
Beckie

Stampin' Up! Supplies Used:
Built for Free Using: My Stampin Blog

Wednesday, September 9, 2015

Square Pillow Box all dressed up with Mr. Skull!

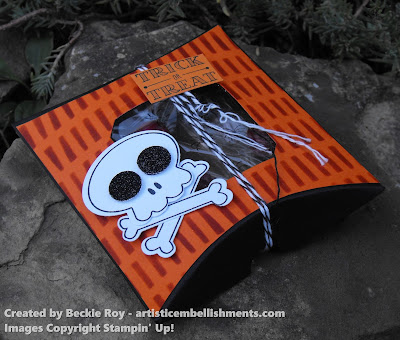
I've got yet another Square Pillow Box Thinlits Die share today. I'm a little bit obsessed, to say the least. I just had to play with that awesome skull image from the Howl-o-ween Treat stamp set, I mainly ordered it for that image - although all the images are fab. I'm slightly obsessed with skulls (only a teeny-tiny bit!). I added some lines with the Decorative Mask: Happy Patterns. Inking up Tangelo Twist with Cajun Craze Classic Ink. 


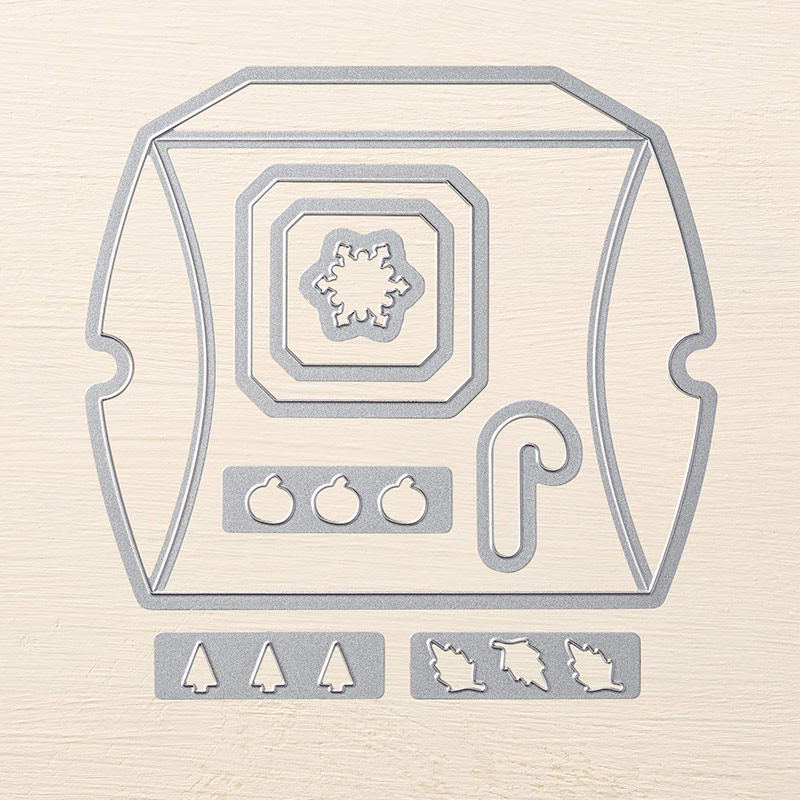
For this box, I wanted to make a window. The thinlits die comes with some add-on's to dress up your box even further. I used the large window die cut. 


The dies also coordinate with a stamp set called A Little Something. I used the Trick or Treat and Spiders stamp on the window. I thought it would look neat with the red cherry candies I have inside the box with spiders on top! That's not weird right?!


I added some 1/2" Circles to the skull's eyes with Black Glimmer Paper. Then wrapped the box with Basic Black Baker's Twine, for the end - rather than a bow I knotted it and unraveled the ends of the strands to look messy! I hope you like it, if you have any questions let me know! Enjoy your day :)


Thanks for stopping by, happy stamping!
Beckie

Stampin' Up! Supplies Used:
Built for Free Using: My Stampin Blog

Tuesday, September 8, 2015

Boo! Treat Holder with Square Pillow Box Thinlit

I've got another box I made with the Square Pillow Box Thinlit Die. This time I die cut 3 of the pillow box pieces. Before I assembled the box - I cut the tops off where the fold line is. I wanted to make a stand up box to house some treats for Hallowe'en. I think I could perfect it further, but you'll get the gist. 


The box base is made with Soft Suede card stock and decorated with some Halloween inspired products starting with the Boo to You Framelits Dies, which I'm in love with to make the witches hat and "BOO!" ... so fun! I started with distressing the top of the box with the edge of my paper snips, it works like the retired distressing tool did. 


I wrapped some Silver Metallic Thread around the box several times to make it look like a spiderweb of sorts. The spiderwebs are cut out from the Happy Haunting Designer Series Paper and of course the awesome Spiderweb Doilies! No surprise those are on back order! Hopefully, not for too long with Halloween fast approaching. I attached them with the Fine-tip Glue Pen - this glue is great for tiny die cuts like this doilies and die cut letters also! For the bottom I simple burnished the score lines made by the die - since the aren't very wide, I die cut some circles and attached to the bottom and inside (to make it pretty) with some hot glue. I tried Stampin' Dimensionals, which did work - but if you put anything too heavy it might come apart, oh the 3 Musketeer carnage... although, it would work for Halloween ;-)


As a final touch, I added some cut of strips of Basic Black card stock and crinkled it to make a nice cushion for my candies. I wouldn't want the "3 Musketeers" to be uncomfortable now would I? I hope you like my treat box, if you have any questions - please let me know! 


More fabulous products have been added to the Clearance Rack today, you can check them out HERE.


Thanks for stopping by, happy stamping!
Beckie

Stampin' Up! Supplies Used:
Built for Free Using: My Stampin Blog

LinkWithin

Related Posts Plugin for WordPress, Blogger...