Monday, March 31, 2014

See ya Later ALLIGATOR!

The final day of Sale-a-bration 2014... sniff :(

Hello Stampers! It's a lovely sunny spring day... that's all I'm going to say on the weather front as that's good enough for me :)

Today is the day that I've been dreading, as I am really going to miss playing with all these fun Sale-a-bration products... we'll I can still play with them, I just won't be posting projects with them anymore. I made this fun card a long time ago... it was actually one of the first things I made when I got my FREE items.

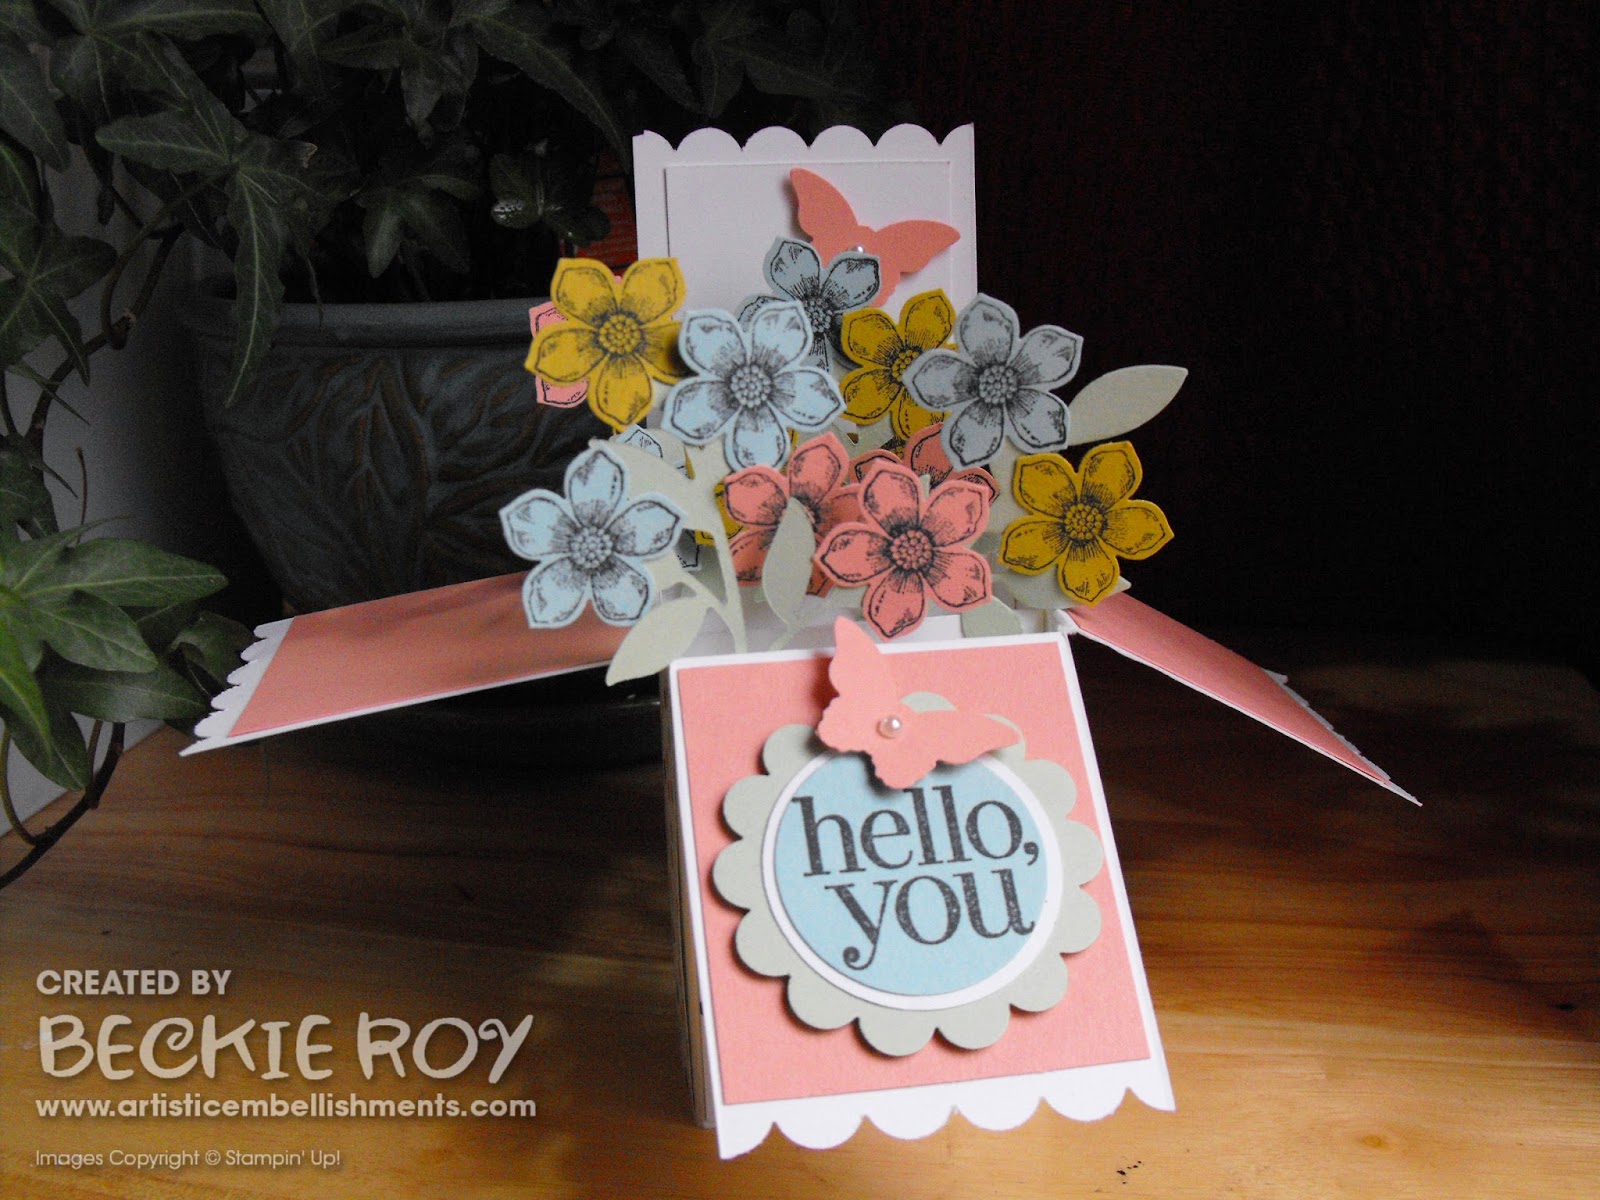
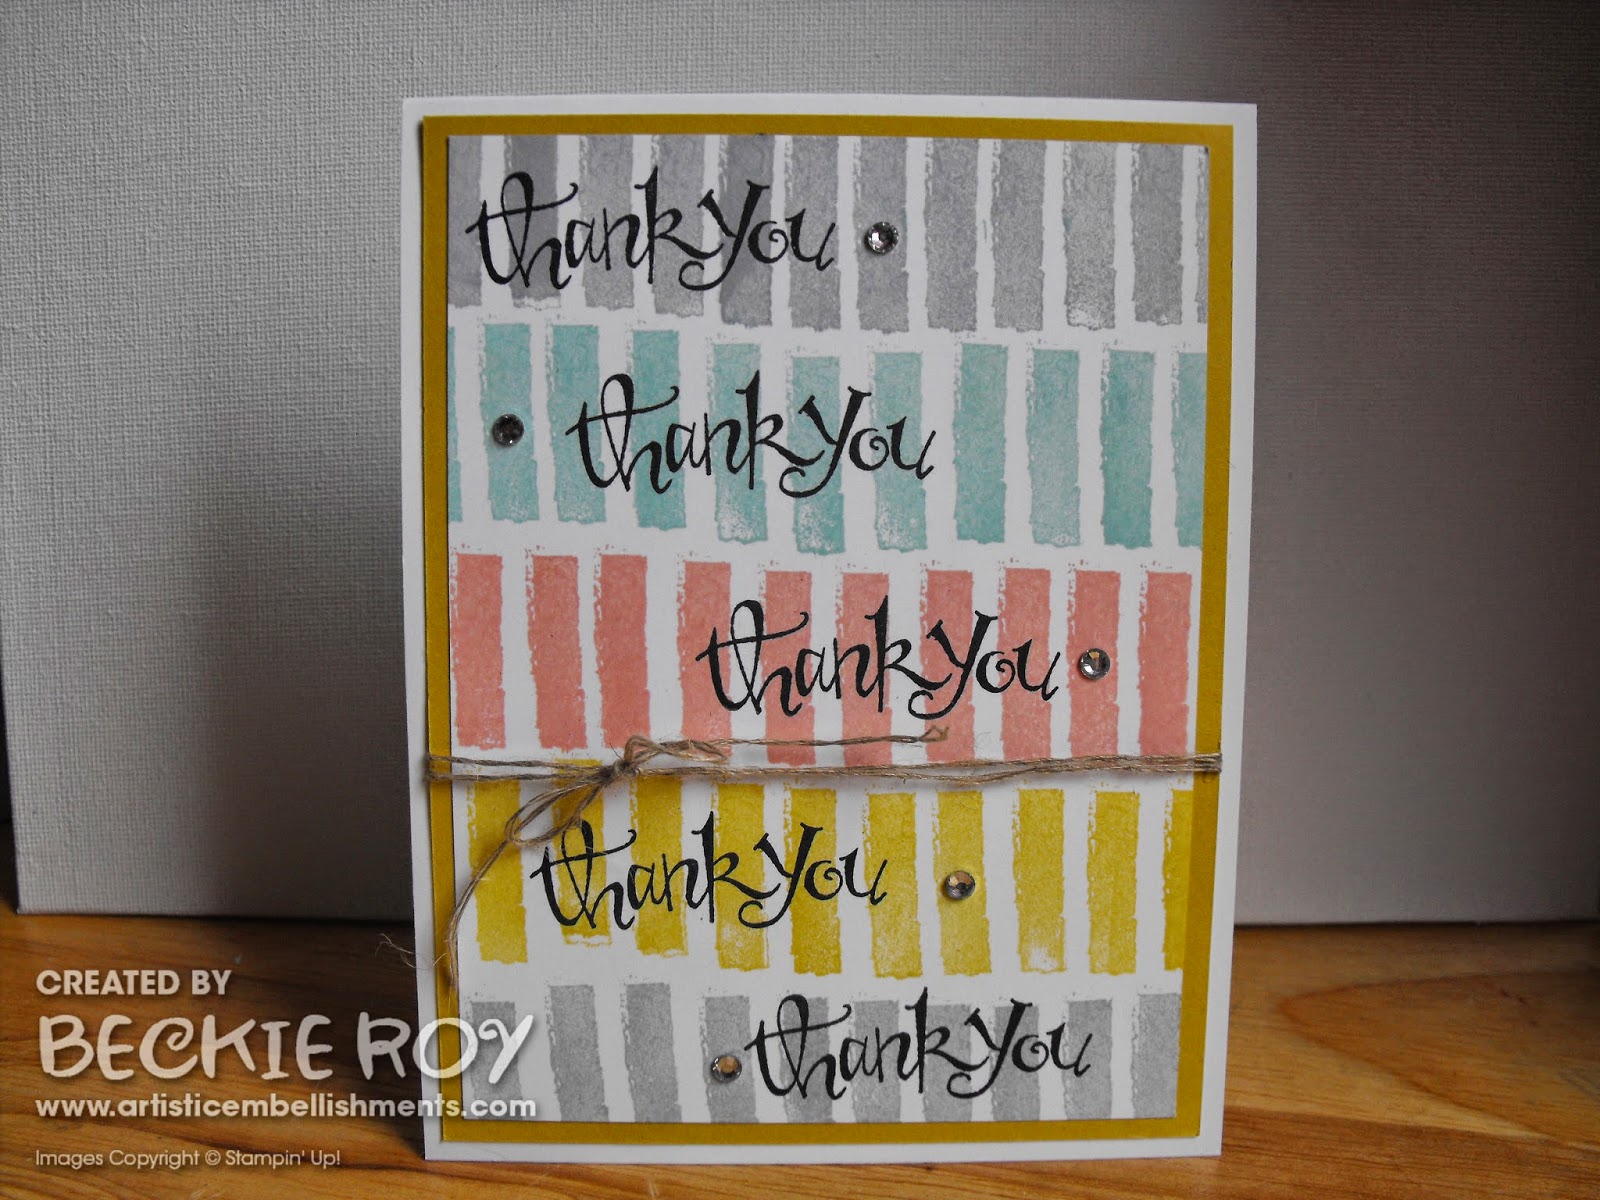
It features the super cute and super fun 'See ya Later' stamp set - which has 4 adorable greetings which work for a variety of occasions. I used a few SAB items on this project, the designer series paper is the 'Sweet Sorbet' paper, the 'Sweet Sorbet Accessory Pack' Crisp Cantaloupe baker's twine and of course the 'See ya later' stamp set.

I thought this card was very fitting as I do already miss them... I made my 'polaroid' using my 'Squares Collection Framelits', as I did not have the 'On film framelits' when I made this card. I embossed it with the 'Arrows' textured impressions embossing folder, and added some glitz with the 'Gold Sequin Trim'.


If I absolutely had to choose a favourite product, I don't think I could narrow it down to just one... I think it would be a tie between the 'Decorative Dots' embossing folder and the 'Sweet Sorbet Accessory Pack' since I'm totally addicted to Baker's Twine and it has 3 of my favourite colours (Summer Starfruit, Crisp Cantaloupe and Pool Party)... so what's not to like! I also love taking my paper piercer and fraying the ends of my twine for a different effect.

I hope you like my card and will check back often for some of my crafty inspirations! Happy Stamping :)

Friday, March 28, 2014

Sweet Sorbet Banners

 Only 4 days left to get your free products with every $60 purchase!

Here's another fun project featuring some of my favourite 2014 Sale-a-bration products. I made a card similar to this one about a month ago using the 'Banner Blast' stamp set. This time I really wanted to show off the gorgeous designs from the 'Sweet Sorbet' Designer series papers. These papers are definitely a favourite of mine - when I first saw these papers the black one with the multi-coloured striped pattern (2nd to last on card) just popped out at me.

I used the 'Banner Punch' to punch the little banners using all 12 of the patterns of the 'Sweet Sorbet' DSP. I started with the polka dots, then flipped to show the Pistachio Pudding with the triangles until that row was completed. I kept going until the whole paper was covered. For the banners at the bottom of the card, I cut them in half and slid them under the one above so they would fit onto my card base of 11" X 4 1/4". I then thought I'd showcase the coordinating Baker's Twine from the 'Sweet Sorbet Accessory Pack' - I decided to braid all three colours (Pool Party, Summer Starfruit & Crisp Cantaloupe) as the papers have all three colours. The 'I like you' sentiment is from the 'I Think You're Lovely', it fit perfectly into the banner punch... it is also a sale-a-bration FREEBIE! These cute banners are so cute and tiny that they're perfect for using up any of those paper scraps you may have kicking around - I can' throw mine away so it's a PERFECT solution!


I hope you like my share, happy stamping :)

Thursday, March 27, 2014

Petal Parade + See Ya Later


Only 5 more days to get your Sale-a-bration products for FREE with each $60 order!

I am continuing with my favourite products from the 2014 Sale-a-bration catalogue! Today my share is featuring one of my most used products, the 'Petal Parade' stamp set. As an avid gardener, I'm a huge sucker for flowers. This set has beautiful images with can be used for so many different types of cards - it is especially great for making fun backgrounds, instead of using designer series paper.


For this card I first stamped the greeting from 'See ya Later', I used a piece of tape to cover the small cloud part of the stamp so I would just have the main sentiment - once inked up, remove the tape from your stamp and huff to re-activate the ink and stamp. The ink I used was Primrose Petals. I then took a punched 1 3/4" Scallop Circle, a sponge dauber and some Soft Sky ink and started to make my clouds for the background. I wanted it to be like a meadow of flowers.

I took the 'leaf' image, well I use it for leaves but it works as a flower too! I stamped using Pistachio Pudding ink multiple times, some I stamped off first for a lighter stamped image. Then using Raspberry Ripple, Strawberry Slush and Primrose Petals I stamped the flower images and cut them out. For the smaller flowers I cut out the center of the largest flower, the medium flower I cut two sizes, one with the whole image and the second I took most of the colour part away, I just saved some of the outline. I added a pearl to the center to finish my card. It came out how it was in my head, so that's a good thing.. since there's a lot going on in there!!

Have a super day! Happy stamping :)

Wednesday, March 26, 2014

Sweet Sorbet Wreath


Only 6 more day of Sale-a-bration!

Hi... it's rather sunny, but still cold here today. I have come to the conclusion that complaining about the cold isn't doing me any good! I sent the memo to Mother Nature many months ago about the rather lengthy winter season (close to 6 months) that we've been having... here in Canada, but no response! On the positive side, I can see some of my lawn - it's going to be a lot of work to get my garden and lawn ship-shape once all the snow melts! But I'm up to the challenge when the white stuff is all gone!

I thought since this was the last week of Sale-a-bration... sniff :( 
It might be nice to share some of my favourite products over the next few days and some projects that I've created with those products. It's a tough decision choosing my top 5, as I love everything! These are in no particular order - that would be even harder... so I'm just saying they are all in my top 5! Today's project features 2 SAB items - one is used much more dominantly than the other but that doesn't mean I love it any less. I used the gorgeous 'Sweet Sorbet' designer series paper and the coordinating Accessory Pack (re. baker's twine).
I knew I wanted to create a wreath the moment I saw the 'Spiral Flower' bigs die from the occasions catalogue. I didn't want to be conventional or traditional and create a round wreath... that I opted to do a square one! I took a piece of cardboard and measured around the perimeter so the square wreath had a thickness of 2" all the way around. I covered it in a piece of the 'Sweet Sorbet' DSP so the cardboard would be covered. I then cut out many, many spiral flowers... luckily with bigz dies you can cut more than one sheet so it didn't take all that long to do. I used almost all the sheets in the paper (I didn't use the patterns with black since it was to be a spring wreath). I made the designer series paper flowers onto the lower right side (left in the photo) and the top left I decided to use the colours from the paper in cardstock for a little bit different of an effect.
 
I used the 'Banners' framelits (the second smallest) to cut my banners using Crisp Cantaloupe cardstock. I stamped the word 'SPRING' with the 'Notable Alphabet' stamp set on Pool Party cardstock and punched each letter out with the 1" Circle and matted onto a 1 1/4" Circle in Pistachio Pudding. I then attached a piece of 'Sweet Sorbet' Baker's twine in Pool Party to attach my banners too! I used a glue gun to attach my banners and added a 3/4" circle to the back to secure it with some more hot glue. I did the same for my twine for the hanger. Lastly I added some butterflies using the Bitty Butterfly & Elegant Butterfly Punch aswell as the Beautiful Butterflies Bigz die. This wreath has a very spring look to it with this stunning Sweet Sorbet Designer Series Paper and the butterflies just finish it off. I hope you like my share, and feel inspired to create something yourself :)
 
Stampin' Up! Supplies Used:
Banners Framelits Dies [132173 - $32.95]
Notable Alphabet [wood: 132047 - $57.95; clear: 126357 - $42.95]
Spiral Flower Die [129379 - $21.95]
Beautiful Butterflies Bigz [114507 - $26.95]
Bitty Butterfly Punch [129406 - $21.95]
 

Happy Stamping :)

Tuesday, March 25, 2014

I think "You're Lovely" Sale-a-bration!

I feel this way about this years' Sale-a-bration... I think you're lovely! All the products are lovely - don't forget there are only a few more days to enjoy getting the exclusive Sale-a-bration freebies!

I made this card using the 'You're lovely' stamp set. I was initally drawn to this set because of the 5 flower stamp, ironically enough it was the last stamp that I actually used... not sure why?! I did, however, use it on this card. I made an ombre effect by using 3 colours that are very close, one a bit darker or lighter than the other. I used Pool Party, Coastal Cabana and Bermuda Bay. I used my Stamp-a-ma-jig to get perfect alignment for this part.. it would have been tricky otherwise, especially with a wood mount stamp! I added some Pool Party Baker's Twine (also free during Sale-a-bration) and unravelled it completely and wrapped it around my card layer.. then added some more to make a tassel just off-center.


I hope you like it, happy stamping :)

Monday, March 24, 2014

Retro Fresh Decor


Hello... It's Monday and the sun is shining, it is still rather cold - but it's nice to have some sunshine!
I'm having a wonderful day so far, I am going to be attending the new 'Catalogue Premiere' in a movie theatre later this month. This is available to demonstrators only, we get a sneak peek of what is in the UPCOMING Stampin' Up! catalogue. I'm so excited to see all the new and fabulous paper crafting products that will be available this June = D

Onto my first share for today, I have another project that I created a little while back using the 'triangle punch'. I just had to finish sealing it with Modge Podge.

I know I have said it many times before how much I love the Hexagon and Triangle Punch - but look at the funky and beautiful projects that can be created. These projects do require some patience and time, but I am super happy with the final project, so it's worth the effort! The hardest part was making sure all the triangles had the same designer series paper patterns before gluing them to the mirror base... I added a bit of bling around the mirror with the Basic Rhinestone Jewels and the flowers are from the Blossom Party Originals Bigz Die. I used the same colours as the designer series paper, Tangerine Tango and Pool Party to make my flowers - I made them in polar opposites and added a Tangerine Tango brad with Candy Dots Brad Bases to finish them off! I turned a $1.99 mirror from Ikea into a beautiful piece of art to display, how awesome is that?! I hope you like my share and feel inspired to create and have fun playing with your paper punches!

 
For my second 'Retro Fresh' share, I had this 'Home' sign on my front door for months now - to be honest, it didn't look very nice. It was all black, boring and lack-lustre. I thought it might be nice to give it a facelift with some of fun Retro Fresh washi tape from Stampin' Up! I started using a diagonal pattern, on strip at a time and trimming off the excess washi. Once I had completed the whole thing, I added some of the gorgeous Gold Sequin Trim to give it some sparkle & shine! I used a black Sharpie marker to outline the edges of the letters to finish it off! Now my door has a 'Retro Fresh' look!

You may have noticed a little grey doggy in the photo to the right, that's my pup - Tucker being nosy as I photographed my sign! It's okay, he looks super cute with his new 'spring' haircut.
 
Stampin' Up! Supplies Used:
Retro Fresh DSP [132993 - $13.50]
Retro Fresh This and That Designer Washi Tape [133001 - $6.50]
Gold Sequin Trim [132983 - $6.50]
Triangle Punch [133375 - $21.95]
Blossom Party Originals [115971 - $21.95]
I hope you'll check back soon for more crafty creations, happy stamping :)

Saturday, March 22, 2014

Mini-Box Card with Tutorial

Hello again... I simply love creating these box cards and this 'mini-box' card is just so super cute!

I used the Petite Petals Stamps and coordinating punch to create this beautiful card. I chose the 'Hello, you' from 'Regarding Dahlias' greeting so it could be used for a variety of different occasions from birthday, and baby, to thinking of you... you would just change up your decorating!


I made the card in the middle using the free Sale-a-bration designer series papers 'Sweet Sorbet' and the 'You're lovely' stamp set. I used the same flowers from the 'Petite Petals bundle' to decorate my box.
Only one more week to get your sale-a-bration FREEBIES, ends March 31, 2014.


Directions
The measurements for this fun card are 8 1/2" X 5 1/2", on the 8 1/2" side score at 2, 4, 6, & 8.  Turn the opposite way with the 5 1/2" side at the top and score in half at 2 3/4".

On the 8 1/2" side cut slits on the score line from the edge of the page to the score line in the middle. On the 8" score line trim 1/2 one end panel completely off, and angle the other so it assembles nice and clean. Add a piece of sticky strip or double sided tape to the small panel.

Optional: Using a border punch or edgelit trim the 4 flaps for a more decorative look to your box.

Cut 2 pieces of 5" X 1 7/8" pieces of cardstock and attach to the panel between the 6 and 8" score lines. This will make the back of the box nice and sturdy.

Now you can assemble your box, remove the tape backing and fold one side over and attach.

Cut a piece of 3" X 3" cardstock in the same colour as your box, score at 1/2" on each end and cut down to a 1" piece with the score lines on each end. Add sticky strip to opposite sides to make the box fold easier. One end will attach with the adhesive side facing towards the front of the box and the other facing the back of the box.

Now it's time to decorate: You will need 3 pieces of 2 5/8" X 1 7/8" for the box base panels and 3 pieces of 2 1/8" X 1 7/8" for the flaps (when scalloped). Then decorate the inside as desired.


Below: Assembled Mini-box card with back panel attached, no embellishments yet!


I hope you have fun creating these adorable box cards, happy stamping :)

Thursday, March 20, 2014

Spring is here..... ?

Hello....... it's finally here, well sort of!? It is officially the first day of spring... and it actually looks like spring, minus the piles of snow on the lawn (it's a lot less than before though!). I thought that in celebration of this long awaited occasion I would make a very 'springy' card - so I went to the 'Backyard Basics' stamp set and made not one, but two springy cards to share. I love this set, the images are so beautiful and very striking especially when done in just black and white.


I stamped all of the images in various positions and punched them out with the hexagon punch (my fav!) and layered them onto Basic Black leaving a small space so that some of the black would peek through... I matted it onto Pear Pizzazz since it's a nice soft, spring colour! I chose not to put a sentiment on my card so it would work for any occasion. I took my card outside and took the photos in my tree, looking up so that you could see the pale blue sky from above and the bottom photo beside some tulips just starting to peek their heads through the once frozen soil... I love the spring, it's such a lovely time for new growth - I can't wait to see the glorious colours that the spring season will bring!


I just can't get enough of these hexagons and this ultra-stunning 'backyard basics' stamp set. To tell you the truth, this was one of the sets that I wasn't too sure about since I'm not a 'colouring-type' person, but something made my buy it... and I'm very glad I did since I use it A LOT, I mean A LOT!!  


To change it up from the first share with the Basic Black, Whisper White and Pear Pizzazz I shared first, I opted to use some Bermuda Bay behind my stamped images. I added some Basic Black hexagons for some nice contrast against the Bermuda Bay - and you can't go wrong with Black + Bermuda Bay = Stunning!

Both of these cards are keepers that I will add to my stock pile of cards that I will never use, as I cannot part with them! I can pull them out and admire them :) I really should start a binder to save all my cards instead of a box! Someday I will have to do just that!!


Hopefully it will warm up so I can get to my actual backyard basics, the snow has vacated... but it's still a bit chilly for yard work!! Good excuse right?!

Stampin' Up! Supplies Used:
Backyard Basics [wood: 129255- $30.95; clear: 129258 - $21.95]
Hexagon Punch [130919 - $21.95]
 

Have an awesome day, happy stamping, and happy FIRST day of spring!

Wednesday, March 19, 2014

Simply Stunning Swallowtail


Hello stampers! We made this beauty at my stamp class last night. We used the gorgeous 'Swallowtail' stamp. I find myself using this stamp constantly, even the digital version of it for many cards and even home decor - I just love it!

To begin, I cut a card base 11" X 4 1/4", scored at 5 1/2". Layers of Pumpkin Pie cut at 4" X 5 1/4" and Whisper White cut at 5" X 3 3/4". I took my Swallowtail stamp and 3 ink colours - I chose Strawberry Slush, Pumpkin Pie and Crushed Curry. Ink up your sponge dauber and apply the ink to your stamp, use the next colour and so on until your entire image is inked. Give a couple of good breaths to the stamp to re-activate the ink and stamp your image onto your paper.

I added some watermarks from the 'Gorgeous Grunge' stamp set in Crumb Cake for some added dimension. My sentiment is from the 'Yippee Skippee' stamp set - a favourite of mine! I absolutely love this technique, I done many with this stunning stamp with a variety of colours, from all blues to a complete rainbow... and all produce a beautiful stamped image and no 2 are exactly alike.

 
Stampin' Up! Supplies Used:
Swallowtail [wood: 131943 - $21.95; clear: 129216 - $16.95]
Gorgeous Grunge [wood: 130514 - $30.95; clear: 130517 - $21.95]
Yippee Skippee [wood: 131341 - $22.95; clear: 131344 - $17.95]
 

I hope you like my share, have a wonderful day :)

Tuesday, March 18, 2014

Paper Piecing Technique: Vivid Vases & Life in the Forest

Hello ~ I am happy to have the sun shining and the day off today! Ever since daylight savings my whole system has been out of whack. My insomnia has come back and I find myself up in the wee hours of the morning... hopefully I will get back on track soon, I miss my zzzzzzzz... Anyhoo...

I'm sad to say that Sale-a-bration is ending soon... in two weeks to be exact.  I thought that since Sale-a-bration is ending, it might be nice to showcase some of my favourites for you over the next few days! I am going to be very sad when these fabulous products retire on March 31, 2014. Today's share features not one, but two fab products!!

I really love the decorative dots textured impressions embossing folder - it is very versatile. You can use it for snow, confetti, polka dots... it works for many different occasions too from birthday to baby cards - I just love it! I made this card with the decorative dots in the background - I used the oh-so-adorable 'Life in the Forest' stamp set from the occasions catalogue. I stamped Mr. Fox and coloured him with Cajun Craze... for the trees I stamped the onto a piece of Sweet Sorbet designer series paper (also from Sale-a-bration). I cut the trees out (the technique is called paper-piecing - directions below) and attached them to a piece of Whisper White, which I used the Circles Framelits to cut out, matted onto a piece of Basic Black. I used the super fun 'Just Sayin' stamp set and Word Bubble Framelits for the sentiment.


For my next card I stamped the 'Vivid Vases' image once onto some Sale-a-bration Sweet Sorbet designer series paper and cut out the vases. I then stamped the image again and added the DSP vases to the second stamped image. This technique is called I coloured the flowers in with Stampin' Write markers - Pistachio Pudding, Pool Party, Summer Starfruit and Crisp Cantaloupe. I used the 'Ovals Collection Framelits' to cut out my images, added some 'White Baker's Twine' onto some Basic Black Cardstock and there you have it a strikingly beautiful card.


Stampin' Up! Supplies used:
Vivid Vases [wood: 133818 - $14.95]
Sweet Sorbet Designer Series Paper (Sale-a-bration)
Ovals Collection Framelits [129381 - $32.95]
Life in the Forest [wood: 133848 - $25.95; clear: 133851 - $19.95]
Just Sayin' [wood: 133200 - $32.95; clear: 133203 - $22.95]
Word Bubbles Framelits Dies [132968 - $30.95]
 
Paper-piecing: To create this fun technique, you simply choose your designer series paper of choice, stamp your image(s) onto the piece of DSP and cut your image(s) out and add them to your project. If you only want to add DSP to certain parts of your project - stamp your full image onto cardstock, then stamp the image again onto your DSP then cut out the image(s) from the DSP and add to your full image that you stamped on your cardstock. It adds a nice effect to your projects.

Hope you like it, happy stamping :)
 

Monday, March 17, 2014

Kaleidoscope Framed Butterfly + Twine Butterfly

Hello ~ I created this beautiful butterfly using the Bargello technique and the Kaleidoscope designer series paper. I printed the 'Swallowtail' image using My Digital Studio and enlarged it to fit my frame nicely. I printed it onto cardstock and cut it out so it would be easier to trace.

 
I cut 1/4" strips of paper and aligned them side-by-side, then you turn the opposite way and cut so you have the various patterns onto each strip. Once you've cut all your pieces you start to assemble your pattern, I chose a zig-zag pattern. I then traced my swallowtail butterfly onto the paper with the Bargello pattern and cut it out. I used a Basic Black Stampin' Write Marker and outlined the butterfly to make it stand out a bit more from the paper I used for the background.

This technique does take a while, but the results are stunning when you are finished. I am really happy with my final project and have another pretty butterfly frame to brighten up my craft room - who doesn't like butterflies, they are so happy :)

I have another fun butterfly art piece for you today. I had a craft class with my favourite older peeps at the Retirement home not long ago, and I had them make String Art. It's really simple to do... first you select your image and place it onto a piece of wood or canvas (if you use canvas, you would use pins, not nails!) and hammer nails all around your design. Once your nails are in you just start by tying a knot around one of the nails and start to wrap you string until you've filled in your shape. This makes very striking art pieces... it's super fun, and easy to do - the hardest part is hammering your nails! For my piece today, I already had a bunch of the Swallowtail templates ready from my first project, so I went with it... you know re-duce, re-use, re-cycle!! I used the Summer Starfruit Baker's Twine which is in the Sale-a-bration catalogue! For my wooden board, it's actually a bamboo cutting board - it worked perfectly!


 If you make a mistake, it's easy enough to unwrap the twine or string and start again! There are so many design possibilities with this technique, I hope you'll try it out!

I hope you've enjoyed my fluttering creations today, Happy stamping :)

Sunday, March 16, 2014

Ikat love!

Hey there!

Have you heard of Ikat? I hadn't before Stampin' Up! released this stamp set earlier this year.

Being curious, I looked it up and Ikat is actually a dyeing technique used to pattern textiles that employs a resist dyeing process that is similar to tie-dye. The word 'Ikat' comes from the Indonesian word 'Mengikat', which means to die.

I did another google search and so many beautiful textile patterns showed up in the image search. I realized that Ikat is everywhere you look, I just didn't know that that is what the pattern was called. Whenever I go shopping I notice it on pillows, blankets and even clothing - I saw the most adorable dress the other day and it was entirely designed with the Ikat pattern! I designed 4 cards using the Ikat Photopolymer stamp set for my stamping inspiration today, I hope you like them...


Happy stamping :)

Friday, March 14, 2014

Saltwater Ink Technique


Hello ~ I'm happy to report we didn't get anymore snow... but it is super windy here, but it's better than snow!

I have a lovely card technique for you today. It's called 'Saltwater Ink' technique, well that's what I call it anyways. You will need a piece of watercolour paper, using an aquapainter or paintbrush wet your paper considerably, add several drops of re-inker (I used Island Indigo, Summer Starfruit and Coastal Cabana) around you paper.

Next, use your brush to move the ink where you'd like the coverage... I wanted the whole piece covered. I like how the yellow and blue made a nice green. You then add salt (I used sea salt) to the wet areas - allow to dry and the like magic the salt will absorb the wetness and take some of the colour away and create a cool pattern for your background.

I was having so much fun with the re-inkers, I added some Island Indigo randomly to my Whisper White Baker's Twine too tie in the Island Indigo a bit more! My hands were covered in ink once I was finished playing with my re-inkers... at least people know what I've been up to! I used a mat of Coastal Cabana and layered it onto my Summer Starfruit card base. This technique is easy and gives a stunning final result and the best part is that no two cards or projects will be exactly alike. I purposely kept my card embellishments on the simpler side to showcase the nice colours in from the Salt-water technique!

  
For this card I used Bermuda Bay, Crushed Curry and Pumpkin Pie ink refills, I cut one of the Hexagon Hive diecuts in Crushed Curry and matted overtop of my watercolour paper. I used the same 3 colours and stamped and punched 9 Petite Petals flowers and attached to the solid spaces on the Hexagon Hive. The bold colours are really quite striking!
This next card uses a different take on the Saltwater ink technique. I still did the same technique, but this time I punched out the flower images from the watercolour paper with the Salt technique applied.
 Here is yet another way to use this fun and easy technique... I randomly added drops of re-inker (in Crisp Cantaloupe and Pistachio Pudding), layered onto Basic Black, diecut a frame with the 'On Film' framelits, and added a cute fox from the 'Life in the Forest' set just because he's so stinkin' cute!! It adds a fun background, with some nice pops of colour!!

  
Stampin' Up! Supplies Used:
Just Sayin' [wood: 133200 - $32.95; clear: 133203 - $22.95]
Word Bubble Framelits [132968 - $30.95]
Life in the Forest [wood: 133848 - $25.95; clear: 133851 - $19.95]
Petite Petals [wood: 133152 - $19.95; clear: 133155 - $14.95]
Petite Petals Punch [133322 - $15.95]
Sassy Salutations [wood:
Hexagon Hive Thinlits Die [132965 - $30.95]
Banners Framelits Dies [132173 - $32.95]
Perfect Pennants [wood: 133227 - $36.95; clear: 133230 - $26.95]
Yippee Skippee! [wood: 131341 - $22.95; clear: 131344 - $17.95]
Watercolour Paper [122959 - $5.95]
Starburse Framelits Dies [132967 - $32.95]
1 1/4" Striped Grosgrain Ribbon [Summer Starfruit: 132980 - $12.50]
Baker's Twine [Whisper White: 124262 - $3.95]
 

There are many more ways in which you can use this effect for your paper crafting projects. I hope you try this fun technique for yourself - happy stamping :)

Thursday, March 13, 2014

L-O-V-E Frame


Hello ~ As I was saying yesterday, we got a lot of snow... today we have a bright shining sun which is starting to melt some of the snow we got! I think winter is still going to be sticking around for a little while, but I'll take the sunshine :)

I made this cute frame a while back and haven't gotten around to posting until now. I think this frame has a 'wintery' feel to it because of the colours! I used the 'Typeset Alphabet Bigz' to cut my letters, which are popped up using dimensionals. I made the background mats with Bermuda Bay, Coastal Cabana and Whisper White, which was embossed with the 'Stripes' Textured Impressions Embossing Folder for some added dimension. I used the 'Tasteful Trim Bigz XL die' to add some more sparkle with the silver glimmer paper. I cut on of the 'Little Leaves Sizzlits' in Whisper White and added a bow using the 1/8" Silver Ribbon. I had some little styrofoam balls that I had for fillers in vases for some holiday decorating that I had done - I thought they'd make cute little berries for the leaf stem. I did have some red ones, but I liked the white on white look. I used glue dots to attach them. 


Stampin' Up! Supplies Used:
Tasteful Trim Bigz XL [120893 - $52.95]
Typeset Alphabet Bigz [127553 - $110.95]
Stripes TIEF [123128 - $9.95]
Little Leaves Sizzlits [114511 - $6.95]
Silver Glimmer Paper [124005 - $5.95]
 

I hope you like my share and here's hoping winter will get the memo and go into hibernation!
Happy creating, happy stamping :)


Wednesday, March 12, 2014

Jelly Bean Bunny!

Hello stampers! What a difference a day makes... yesterday sure was nice change from our usual snowy days! I actually got to wear my flip flops and a spring jacket last night. Then I woke up to a blizzard, I was in such shock... I really thought that Old Man Winter had gone into hibernation and spring was to show us her beautiful glory... no such luck, that's what I get for buying new flip flops yesterday! Hopefully this is the last of it, the snow was finally starting to melt and now we have another two feet. Enough weather talk, it's depressing me and I have an adorable share for you today!!

I made these super cute Easter Bunnies with punches. I had a craft sale last weekend and these were one of the items that I was selling - I got a lot of compliments on how stinkin' cute they were!

I'll sum up the punches and framelits I used in case you wanted to make some for yourself. All supplies are from Stampin' Up! For the legs I used the 1/8" Cello Bags and filled them with jelly beans, but you could use Smarties, M&M's, or any other small candy that will fit in the bags.

I used the Oval Framelits to make the bunny body. I cut the largest (scallop) oval and cut it in half, the 3 largest for the bunnies face (I cut 2). I cut two to use on the back to cover the glue on the back of the bags (legs). Both were cut with Crumb Cake cardstock - I made some with Whisper White also.


Now for the punches:
4-Extra large oval punches for the bunnies ears and feet (Crumb Cake)
2-Large oval punches for the inside of the ears (Primrose Petals)
2-1 1/4" Circles punches (Crumb Cake) -and add some whiskers with a Black Stampin' Write Marker.
1-Small heart punch for the nose (Primrose Petals)
2-3/4" Circle punches for the eyes (Whisper White)
2-1/2" Circle punches for the Iris of the eyes (Baked Brown Sugar) -you can use any colour you like.
2-1/4" Circles from Itty Bitty Shapes punch pack for the eye pupils (Basic Black); 6 for toe pads on feet (Primrose Petals).
2-1" Circle punches for feet (Primrose Petals)
1-Word Window punch for lips (Primrose Petals) -I cut it in half and just had a tiny bit showing.
1-Petite Petals punch for flower (Crushed Curry ink on Whisper White) -you can use any colour.

Use a glue gun to attach the 1/8" cello bags to the Largest Oval Framelit (cut in half) - add more glue to the back and add the other half to secure the legs in place. I added a dimensional to the top to secure the upper part of the diecut. Then I added the 3rd largest Oval Framelit to the back to make it all tidy on the back. I used a glue gun to attach the feet also - you can add a white pompom to the back for a tail if you want. I hope you like these adorable bunnies, they are super cute and easy to re-create. You can also adjust to use punches that you already have. I will be giving some of these out at my class in April - so hopefully my class attendees will like them!

Here is another one I made, but in white! It's the same process and materials, I just used the second largest oval framelit for the body!!


Have a great day, bundle up and stay warm :)

Monday, March 10, 2014

Cork + Arrows


 Hello stampers!

It was so beautiful today, a nice early spring day... I hope these warmer, sunny days continue.

I  was playing around the other day with some of my sale-a-bration freebies and really wanted to make a cool card with the 'cork' pieces that come with the Sweet Sorbet accessory pack - here's what I came up with...

I used some Basic Black and Pacific Point cardstock. I cut 1/2" strips of Pacific Point and 1" strips of Basic Black and ran them through my Big Shot with the 'Arrows' textured impressions embossing folder. I really like the effect of embossing multiple colours of cardstock! I started by adding the scallops to the center line of Pacific Point and it really pops off the page - I thought why not add some of the pretty flowers too!! The cork pieces really add a nice dimension to the card and I'm quite happy with the final project. 

Have a great day, happy stamping :)


Friday, March 7, 2014

Life doesn't have to be perfect...

Hello again ~ another sunny, and not extremely cold day here... I think spring may have finally got the message and is on its way.. Hopefully?!

I recently participated in a swap a couple of weeks ago... I must say that I love swaps - it's a good way to get lots of ideas and samples using various Stampin' Up! products some that you may or may not have yourself!

For my swap I really wanted to try to make a masculine card - I thought I'd try some Pacific Point and Basic Black mixed with a bit of shine from the Metallic Silver Encore ink pad. I used the Petal Parade stamp set from the Sale-a-bration brochure (a definite favourite of mine), who am I kidding... I love every product in the brochure! I really love this arrow stamp - it adds a nice effect to the background for a card or paper project. I tried it out with the silver ink on the black and it was so striking so I went with it. Even if the image didn't stamp perfectly it gave a nice distressing effect to the card that was quite nice!
 

I added some Silver Baker's Twine, another favourite of mine is baker's twine - I use it on almost every project I create - and with the added sparkle from the silver and gold makes it even better!! The sentiment is from the 'Perfect Pennants' stamp set (from the Kaleidoscope suite! go figure right?!) I love this sentiment, it is so true because life doesn't have to be perfect to be wonderful, what is perfect anyways?! I used the 'Circles Collection Framelits' to cut out the Basic Black layer, the 2 1/2" Circle Punch to cut the Very Vanilla layer and the 'Starburst Framelits' to cut out the Pacific Point layer - I punched a 'small heart' in Silver Foil for some more shine.

The card swappers seemed to like my card, I hope you do too! Happy stamping :)

Thursday, March 6, 2014

Beautiful Banners


Hello stampers!

Finally a sunny winter day without freezing temperatures or windchill. It has been a miserably cold winter and today wasn't too bad! 

I've got 3 shares for you today they are featuring a very trendy product for the paper crafter... the banner! 

Whether it is a punch, a stamp, a diecut or framelit they are all the rage right now. I made three completely different cards using the Sale-a-bration Banner Punch (FREE with a $60 purchase until March 31, 2014).

For my first card I used the striped banner stamp from the 'Perfect Pennants' stamp set and stamped half of my Basic Black cardstock in Gold Encore Ink and the other half with the Silver Encore Ink (metallics are also all the rage right now!)

I cut a 1" strip of Silver Foil cardstock and embossed with the Decorative Dots embossing folder and sanded for a 'metal-like' effect. I then punched a bunch of silver and gold banners, and diecut a Gold foil circle and attached the banners like a sunbeam! This would make a nice anniversary card for a 25th or 50th wedding anniversary!


My second card I attached my punched banners with only a slight space between, then added another layer with one less banner to either end of my card layer. I think it adds a nice effect to the card with the zig-zag look the banners created. I used some linen thread to make an 'X' pattern in the center of my layer and added some bitty butterflies and my sentiment.


My final card for today is made with a lot of banners... I stamped six of each colour banner using the Banner Blast stamp set from Sale-a-bration and punched them out. I started at the top and worked my way down. I then made a starburst with the banners around my sentiment to finish my card off.


I hope you have enjoyed my share featuring BANNERS and you feel inspired to create some projects for yourself! Happy stamping :)

Wednesday, March 5, 2014

Craft Show Shares

Hi Stampers ~

I'm busy prepping for a craft sale this weekend... I'm up to my eyes in caramel corn and chocolate popcorn... sure, it sounds good.. which it is, but it's a sticky mess and I like clean, neat and organized.
 
I've been prepping for this show for a while now, the event is a dessert fundraiser to help stop human trafficking, it is called Priceless Hamilton. People pay $10 to get in and you can enjoy all the desserts and coffee they want - all vendors donate a portion of their sales towards the efforts.  
  
Here's how I decorated my popcorn treats for my sale... I used some Sale-a-bration 'Sweet Sorbet' designer series paper and Summer Starfruit cardstock (both together to make a fuller flower) - cut using the 'Spiral flower' from the Occasions Catalogue, Celebrate the Everyday! I used a pair of jewelry pliers on the end of the spiral and wrapped the paper around, once it was started I took it off the pliers and worked the flower around with my fingers. I let go slightly to allow the flower to 'blossom'. I added a bit of hot glue to the bottom and ta-da! a beautiful flower in just a matter of seconds. I cut two leaves using the 'Autumn Accents' bigz die and attached them underneath my flower. I attached some 'Gold Sequin Trim' to the back aswell and attached them to my popcorn with a piece of 1 1/4" Striped Grosgrain Ribbon... in Summer Starfruit to match!


When baking, I didn't forget about my furr-friends! I made some Wheat-free Almond Oat Dog Biscuits and Pumpkin Oat Biscuits- my dog Tucker sure did enjoy being the taste-tester! He is actually very fussy about which 'treats' he chooses to eat - he likes to go through the garbage but when it comes to treats he has standards?! He's an odd pup... I wonder where he gets that from???? It's a mystery...lol! I also made some Catnip treats for my kitty friends!

Here is a photo of how I packaged my biscuits - I don't have a stamp with a dog, so I went to My Digital Studio in search of one - I found a couple of good ones. I used 'Man's best friend' which has a variety of dog images including the fire hydrant that I used and 'Patterned Pets' which has different animals besides the dog one I used. I used the 4X6" cello bags to package my biscuits, then I cut the 'Top Note' and folded it in half and attached it to the top of the bag - these biscuits were a big hit!


 I made these cute Flower Tootsie Pop Bouquets too! I cut a lot of these 'Spiral Flowers' using the Bigz die. I wrapped them around a Tootsie Pop and adhered with hot glue - the leaf is from the 'Autumn Accents' Bigz Die. I used Blushing Bride and Wild Wasabi cardstock.


I think these chocolate bunny faces turned out so stinkin' cute! I made a bunch of different flavours, from white chocolate, milk chocolate, dark chocolate and even peanut butter suckers. The mold is so cute, it's a bunny face so you can take fun photos with the pops! I used the 'Ovals collection framelits' to make the bunny head, the Extra Large oval and Large oval punches for the bunny ears, for the eyes I used the 1 1/4", 1" and 3/4" Circle punches - to finish these already adorable chocolate suckers I added a piece of 'Crushed Curry Chevron Ribbon' for the bow tie and the 'love ya' from the 'Word bubble framelits and just sayin' stamp set. I used Whisper White, Blushing Bride, Basic Black and Wild Wasabi Cardstock for the white bunny and Early Espresso, Primrose Petals, Whisper White, Basic Black and Pool Party cardstock for the brown bunny. 

 
I have made several different frames like this one... in many different colours. They are very pretty, and they actually resemble the real framed butterflies you can purchase. I used the stunning 'Swallowtail' stamp to create this framed art piece. This one was my favourite because it's all oranges and yellows - my favs! The colours I used were So Saffron, Crushed Curry, Daffodil Delight, Cajun Craze, Pumpkin Pie and Tangerine Tango.


I stamped the image 3 times and layered with dimensionals... it's a bit of work and fussy cutting, but the end result is stunning!

Sorry for the shadows on the prints, it's so hard to photograph pictures with glass...
but you get the idea!!
 
  I hope you like my shares ... happy stamping and keep warm :)

LinkWithin

Related Posts Plugin for WordPress, Blogger...