Friday, January 31, 2014

Two Hooray's for today!


Hello ~ My card for today is exactly how I feel! In a few more hours I get to go see one of my all-time favourite bands - AFI! The last time I saw them was back in 2010 when they opened for Green Day, so it's been a while. I go to a lot of concerts, you'll figure that out!
Anyhoooo, I could go on about my love for this band for days... but I should talk about my card shares for a bit! They all feature the 'Geometrical' stamp set from the occasions catalogue. I made a banner with the triangle stamps and coordinating triangle punch. I chose to use the 'Kaleidoscope' designer series paper since it's so bright, and vibrant - they just make you happy! I added some fringe to the bottom - because let's face it the fringe scissors are so fabulous I don't need an excuse to use them!

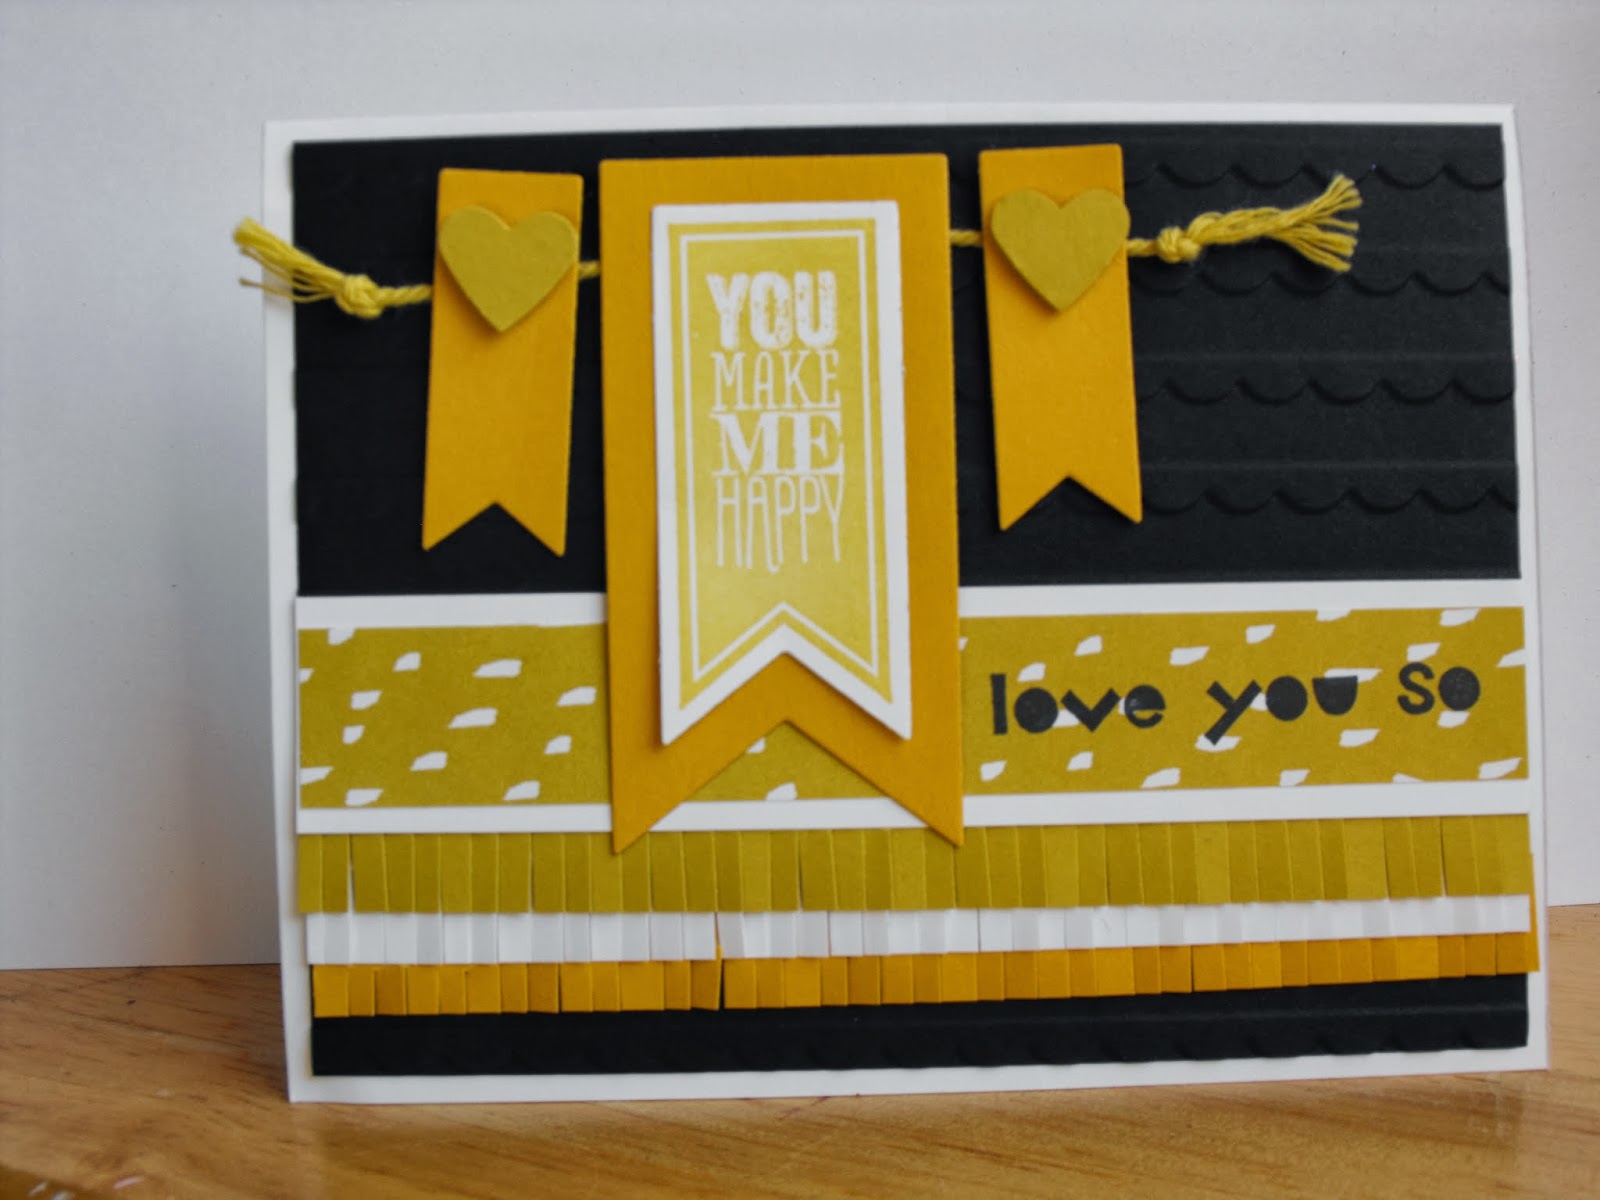
My first card is very similar to the first, only with a slightly different banner and some added fringe. For this banner I stamped 3 of the triangle stamps from the set and punched them out - layering them over each other. I added some Silver Baker's Twine and frayed the edges to look more like tassels - I love the frayed look with this twine! I used the same sentiment, but opted for the ovals framelits this time. I added some Crushed Curry, Basic Grey and Bermuda Bay fringe.

 
My second card is actually the very first card I made when I first sat down with this stamp set and played. I started with a piece of Crushed Curry, which I embossed with the 'Arrows' Textured impressions embossing folder. I then stamped various triangles in Crushed Curry and Coastal Cabana, then I punched them out. I added a panel of Coastal Cabana for the center with the raised side of the embossed image, versus the debossed like the background piece. I then stamped the sentiment in Coastal Cabana and cut out with the 'Ovals collection framelits'. I added a fringed strip of Whisper White cardstock under the Coastal Cabana strip for some more interest. I like the look with Basic Black cardstock and with Whisper White - this set is so crisp and clean with the basic neutrals the fun geometric patterns really pop!!

 
Stampin' Up! Supplies Used:
Geometrical [wood: 133158 - $36.95; clear: 133161 - $26.95]
Triangle Punch [133375 - $21.95]
Arrows TIEF [132187 - $9.95]
Fringe Scissors [133325 - $13.50]
Baker's Twine [silver: 132976 - $3.95; gold: 132975 - $3.95]

 I hope you like my cards, Happy Stamping :)

Thursday, January 30, 2014

Masked Technique

Hello, it's Thursday and a windy day outside... I wanted to share a cute and very simple to do card that I made the other day. It's using the ever-popular masking technique. It's really rather simple, you just use the green or blue painters tape and rub a piece on your ink pad and attach to your paper... and ta-da... you have a fabulous background for your cards! I just love this technique. Basically the tape is being used as a stamp!!


I used 3 different Sale-a-bration FREEBIES on this card, you can choose a FREE product with each $60 purchase you make!! The top cardstock layer in Whisper White (5" X 3 3/4"), I embossed the bottom portion using the 'Decorative Dots' textured impressions embossing folder. I used Sahara Sand, Crisp Cantaloupe and Pistachio Pudding for my card for my masking technique. I the stamped sentiment is from the 'See Ya Later set'... I used the Stamp-a-ma-jig to make sure the greeting was centered with the black border on the stamp just under the Pistachio Pudding masked line. I added a piece of  Crisp Cantaloupe Baker's Twine from the 'Sweet Sorbet Accessory Pack'. I punched the cupcake with the Cupcake Builder punch, the liner in Sahara Sand, the icing in Crisp Cantaloupe and the sprinkles in Pistachio Pudding so the card coordinated nicely!
 
Here is another masked card I made, this time I aligned the tape diagonally and used 'Fabulous Florets'. It is a fun and easy technique, I hope you'll try it out for yourself.
 
 
Hope you like it, try not to let the wind blow you away today... Happy Stamping :)

Wednesday, January 29, 2014

Hello, you... Sale-a-bration


Hello ~

It's another super cold day here.. I'm glad I have the day off and don't have to go outside. Yesterday I had some time to play before my Sale-a-bration technique class, I made this cute card yesterday using some sale-a-bration products - it didn't make it into the class, but I still think it's a fun card!

The iris folding was done with the Sweet Sorbet Designer Series Papers [133521 - 13.50 - FREE], I also used the coordinating Sweet Sorbet Accessory Pack [133522 - 14.95 - FREE]. These are just two of the fabulous products that you can choose for FREE when you spend $60 before S&H and Taxes!

I used the Circles Collection Framelits to cut the circle in my card for my Iris Folding, then made a frame with Pool Party cardstock to give it a bit of a pop! I added a few punched small hearts and some of the cork pieces from the Sweet Sorbet Accessory Pack with Rhinestone Basic Jewels in the center for a bit of sparkle! The sentiment is from Regarding Dahlias. I hope you like it !!


Happy Stamping :)

Tuesday, January 28, 2014

Sale-a-bration starts today, swap #2: Retro Fresh

Woooohoooo! The day has arrived... now everyone can enjoy these awesome exclusive products with every $60 purchase (before S&H and taxes). Sale-a-bration products are available with a qualifying purchase until March 31, 2014.


Click on the link below to view sale-a-bration catalogue:
 
 
Here is the second swap that I made for my demo swap on the weekend - how fitting that it says "Hooray for today" when Sale-a-bration starts today so a "hooray" is very fitting!
 
I used the new Arrows TIEF, the new Gold Baker's Twine and the new Gold Sequin Trim - I used the colours from the retro fresh suite: Coastal Cabana, Tangerine Tango, Baked Brown Sugar, Very Vanilla & So Saffron - I really love this colour combination! I originally had another design in mind, but when playing around I like the look I created for this card. I chose to use the 'de-bossed' side of the cardstock after embossing and just cutting one panel of the arrows to use the 'embossed' side and flip the arrows the other direction. I stamped my sentiment and punched with the 2 1/2" circle punch and just started adding colours and circles until I liked it and I do! I hope you do also?


Happy Stamping :)
 

Monday, January 27, 2014

Occasions and SAB Swap #1: You make me Happy

Hello..... it's Monday! Not sure whether I'm excited about that or not?! I am excited for this week because tomorrow is the first official day of SALE-A-BRATION!! I don't know if you've seen any of the products, I've shared some in my previous posts.. I LOVE everything! Such great colour combos, products and all for FREE with a $60 purchase. Sounds good to me :) 

Another reason why I'm super excited this week - one of my all-time FAVOURITE bands AFI is coming to Toronto and I'm going!!!!! I've been wait since 2010 to see them again, and I'm totally in love with their new album - and, I'm not going to lie - I love the singer Davey! He's just so awesome :)

Anywhooo... back to stamping info..... I went to our semi-annual demonstrator meeting with my upline and others in her downline yesterday and I participated in a two swaps, so today I'm going to share the cards that I made with you today... the criteria was to use NEW products from the Occasions catalogue or the Sale-a-bration catalogue - I used some of both!

This was the first swap card I made... I just had to use one of my favourite colours (although most people don't like it) - summer starfruit. I actually like any yellow colour, they make me happy! I paired it with classic black and white with a punch of some Crushed Curry too. I just had to have some of that fringe - I just love the fringe scissors!!


NEW Supplies Used:
Occasions: Scallops TIEF, Fringe Scissors, Perfect Pennants stamp set + Banners Framelits, Geometrical Stamp set
Sale-a-bration: Sweet Sorbet DSP, Sweet Sorbet Accessory Pack (summer starfruit twine)
I was very impressed with the quality of cards from this swap,
we definitely have a talented group of stamping ladies! 
 
Don't forget Sale-a-bration starts tomorrow, I'll share my second swap card with you then. In the mean time keep warm & happy stamping :)


Sunday, January 26, 2014

Colourful Kaleidoscope present card

Hello ~ This afternoon I participated in two demonstrator only swaps. Swaps are always fun, to see how others use Stampin' Up! products in different ways - but also you can see stamp sets you may not own and the potential they may have! My card today is not one of my swaps, but I think it super fun and wanted to share it with you.
 
The stamp I used on the background may not be so obvious, it's from the 'geometrical' stamp set! My #1 from the occasions catty! I decided to make like a 'kaleidoscope' type effect with all the circle stamp and many, many bright and vibrant colours! Since the geometrical stamp set is part of the 'kaleidoscope' suite it works perfectly! I decided to make it into a present with some gold baker's twine. I just love bright colours, they make me smile :)
 
Just over one day left until sale-a-bration begins on Tuesday, January 28... I'm super excited, are you?!
 
Happy stamping !! 

Friday, January 24, 2014

Retro Fresh Journaling Tags... cards & more!

More Retro Fresh Journaling Tags cards...

"Mr. Fox" card: This time instead of using one of the 'pre-printed' tags, I used some of journaling tags. The non-text tags are also very versatile in lieu of designer series paper. I really liked this graph paper styled tag. I used LOTS of different colours on this fun card - crushed curry, soft suede, cajun craze, coastal cabana, so saffron & tangerine tango. I just kept on adding colours and layers... I added some rows of paper piercing to the left side on the cajun craze cardstock. I added Mr. Fox from the 'Life in the Forest' stamp set - since even with all the layers of paper it still needed something and what's better than a cute fox! The birthday sentiment is from the 'remembering your birthday' stamp set from the annual catalogue 
 
"Happy Birthday Word Bubble": This card has an adorable word bubble birthday greeting. I made a layer of 'coastal cabana' and a piece of the 'fresh prints designer series paper stacks' paper. These papers are another FABULOUS product offered, I absolutely love all the designs, the colour combos... and the price... you can't complain about that! After the DSP was layered, I added some new 'gold baker's twine' - I love that it's in 'very vanilla'. I then layered it onto 'so saffron' cardstock and popped up on dimensionals, and lastly I added some more small heart in 'so saffron' and 'gold foil' cardstock. 


The photo below features the cards I shared along with some of the magnets that I made using these oh-so-fun tags!!

 
I highly recommend these tags, they can be used for a multitude of diffrent projects... not just for tags!! Don't forget Sale-a-bration starts next Tuesday!!! I'm super excited, are you?!
 
Stampin' Up! Supplies Used:
Retro Fresh Designer Journalling Tags [133526 - $5.95]
 

I hope you'll come back and visit for more stamping inspiration, happy stamping :)


Wednesday, January 22, 2014

Retro Fresh Journaling Tags... Magnets!


Hello ~ it's another cold, but sunny day here. I've been playing with the new 'Retro Fresh Designer Journaling Tags'. When I first saw the new Occasions Catalogue by Stampin' Up! I immediately fell in love with the Retro Fresh and Kaleidoscope suites. I just love the colours, the funky stamps and embellishments. These tags were among the first products that I said "I must have this!".

These designer tags are intended for the 'This and That Journal', but when I first saw them I immediately thought what cute magnets they would make! My favourite being the one with the 'awesome sauce' - since it has a bottle of what appears to be ketchup, and I love ketchup. These tags are so easy to make into cute magnets - just make a couple of mats using cardstock for each tag image and add a few punched pieces or twine... whatever you want - easy, peasy! You have some cute magnets for your fridge!!


Do you know what 'Huzzah' means? I didn't - but I figured it was a good thing.. I was curious so I looked it up and it is used to express joy, encouragement or triumph! So I was right, it is a good thing!

These tags are not just for journals anymore. I hope you like my share - happy stamping :)

Saturday, January 18, 2014

You make me happy!

Hello ~ I'm up super early today... I have insomnia on a pretty regular basis, but I usually work afternoons so it's not a problem getting some zzzzz's later in the day. Sadly, for me today I have to work early and I am going to be sooooo tired! Hopefully I don't get confused for an actor on Waking Dead! Oh well, I'll motor through it...(it's days like this I wish I liked coffee!). I have a drop-in for some customers tonight with some fun make n' takes using new products from the Occasions Catalogue that I'm excited for - I'll share them with you next week. Anywhooooo, onto my card share for today!
 

It makes me happy and Sale-a-bration definitely makes me happy! It's almost here... a little more than a week until everyone can earn some fabulous sale-a-bration items with a $60 purchase! While the sentiment from this card isn't a SAB item - it seemed perfect for this card. As I've said many times before I LOVE the 'petal parade' stamp set from this year's sale-a-bration catalogue! I have used the other images many times before - I realized I hadn't played with this 'FUN' arrow stamp... so here it is, my first attempt, I think it turned out great... but I may be a little biased!?

I stamped the arrow in all of the 'in colours' from 2013 - 2015, alternating the arrow direction with each row. I layed my stamped paper onto 'baked brown sugar' , added a small piece 1/4" of the same colour for a band, which I added another fringed piece of the 1 1/4" burlap ribbon. Then I thought what else can I add, I used the 'YOU MAKE ME HAPPY' greeting from the 'Happy watercolour' stamp set and added some cute flowers from the 'petal parade', stamping off so the ink wasn't so bright. I then cut it out with the 'deco labels' framelits and layered it onto a piece of 'champagne glimmer paper', also cut with the 'deco labels' framelits in one size larger. Lastly, it needed some more sparkle... so I added some bitty butterflies in the same glimmer paper.

Hope you like it - Happy Stamping :)

Thursday, January 16, 2014

Hardwood + Pretty Petals

Hello ~ It's another cold one out there today, I can hear the whistling of the wind... I'm not looking forward to having to go outside, but I have to leave for work very soon.
 
I had the chance to play with some new products that I got the other day, and I must say I absolutely LOVE the new 'Hardwood' background stamp. The beautiful details in this stamp are amazing, a great addition to any stampers collection. It would make great masculine cards too, which is often a challenge.

For this card I used a base of Soft Suede cardstock, then stamped the 'Hardwood' stamp onto Whisper White' cardstock and sponged the edges with soft suede ink. I used the 'Ovals Collection Framelits' & popped the outside on dimensionals to a piece of Basic Black and the oval right to the card.

I then stamped and cut out some of the images from the new 'Peaceful Petals'. This stamp set makes me wish it was springtime and I can play in my garden - in the warm sunshine! I coloured the leaf image in Wild Wasabi and I stamped TWO of the flower image and coloured them with Pumpkin Pie and Tangerine Tango. I cut the stem and flower out with my paper snips and popped the flower up on dimensionals. The sentiment is from the Petite Pairs and I added the cute birdie from the Backyard Basics stamp set!


Now for my second card... For this card I did basically the same as the first, but changed up the colours and stamp sets used! I used the card base and layer in Soft Suede. I stamped the 'Hardwood' stamp onto the Soft Suede layer, diecut the center out with the 'Deco Labels' framelits (3rd largest size). You save the piece you cut out. I sponged the edges of the layer, including the window cut out. Then add dimensionals to pop up the window piece. The piece you cut out earlier is now glued and placed in the the window hole. I stamped several of the 'Blessed Easter' tulips and coloured and cut them out.. a lot of fussy cutting, but it's worth it! I then arranged them inside and outside the window until I liked the placement. I then stamped and diecut the butterfly image from 'Backyard Basics' and attached over the left side of my window. The sentiment is from the 'Six-sided sampler', and punched out with a 1 1/4" and 1 3/8" circle punch.


Stampin' Up! Supplies Used:
Hardwood [wood: 133032 - $21.95; clear: 133035 - $16.95
Peaceful Petals [wood: 133104 - $35.95; clear: 133107 - $25.95]
Backyard Basics [wood: 129255 - $30.95; clear: 129258 - $21.95]
Blessed Easter [wood: 133312 - $14.95]
Six-sided Sampler [wood: 130953 - $32.95; clear: 130956 - $22.95]
Ovals Collection Framelits [129381 - $32.95]
Deco Labels Collection Framelits [130102 - $30.95]

I love how these cards turned out... and I hope you do too! Happy stamping :)

Wednesday, January 15, 2014

Hooray for Birthdays

My share for today is a card I created for a swap I am participating in. I am actually doing 3 different swaps this month... I have altered the swap slightly from my original card, but not much. This is yet another card using the sale-a-bration (beginning January 28) called 'petal parade', I just love it - the flower images are so beautiful.


I stamped the different images in bold colours [Bermuda Bay, Cajun Craze, Crushed Curry and Gumball Green]. I randomly stamped the images and layered onto Bermuda Bay and Crushed Curry Cardstock. This is another fun way to add lots of colour if you don't have any coordinating designer papers.

I added a band of Bermuda Bay embossed with SAB Decorative Dots embossing folder. I added two sentiments one from 'Geometrical' and the other from 'Sassy salutations'. I stamped the large flower image 3 times and cut out the different layers and attached to the band. I LOVE how this card turned out!!I also hope that the recipients of my swap do too!

Happy Stamping :)

Tuesday, January 14, 2014

Quick Thank You Note Cards


Today, I'm going to share with you some super cute 3x3 note cards that I made the other day.

I used the upcoming Sale-a-bration stamp set 'Petal Parade', available with a $60.00 order (before S&H/taxes) - beginning January 28th. I randomly stamped 3 of the images in Crushed Curry, Crisp Cantaloupe and Pistachio Pudding - then mounted them onto the coordinating cardstock.. and ta-da! You have some adorable cards to give! I am a huge fan of stamping my own backgrounds to use instead of always using designer series papers... this stamp set is perfect for that!


Stamped sentiment: Sassy Salutations [wood: 132070 - $28.95; clear: 126707 - $21.95]. This is a great greeting stamp set - includes: thinking of you, congratulations, happy birthday, feel better, Merry Christmas and thank you.

I just got my order in today... and I'm excited to play with all my new goodies!! Hopefully I can get some done today so I can share them with you tomorrow!


I hope you like my share, have a wonderful day and happy stamping :)

Monday, January 13, 2014

Gee thanks...

 
It's Monday - and a windy one out there today! I'm happy to see most of the snow has melted the last few days. My card share for today is another cute one I made with the 'Life in the forest' stamp set

What does Fox say? He says, gee thanks!  I opted for the white and black look once again, and just made some grass with the fringe scissors and pistachio pudding cardstock (I love the fringe scissors!). I really like the simplicity of this card, I'm really enjoying playing with this stamp set - initially, I thought it would only work for children's cards... boy was I wrong! I think it's absolutely adorable and great for the spring season. The greeting 'gee, thanks' is from the 'Just sayin' stamp set and coordinating framelits

Until next time, happy stamping :)

Sunday, January 12, 2014

Once in a lifetime...

Hello on this Sunday morning :)

I'm about to head off to work, but before I do I wanted to make sure I posted this charming card that I made last week for a sneak peek and some stampin inspiration. I used the Sale-a-bration stamp set 'Petal Parade' to make the background (stamped in Sahara Sand, Pool Party, and Crisp Cantaloupe inks). I added the sentiment over the top of my collaged stamped images in stazon ink - the image is from the 'see ya later' stamp set, also in Sale-a-bration.

 
I really love all the new sale-a-bration items this year, some products for all different styles and tastes - but they can still coordinate together... I just love that about Stampin' Up! I layered the collaged piece onto crisp cantaloupe, summer starfruit, and using the edgelits to cut the pistachio pudding. The love you so is from the new 'geometrical' stamp set in the occasions catalogue! I've got some great samples using that set to share later with you. Enjoy the rest of the weekend, I'll see you tomorrow...

Happy Stamping :)

Saturday, January 11, 2014

Simply Stars Venetian Romance Scrapbook Page

Hello.... I have THREE main vices.

1) Paper Crafting Supplies
2) Gems & Minerals
3) Concerts

I love all three equally and am totally obsessed with all of them! None of these things are bad, they are just things I just couldn't live without... besides people, pets... you know the usual stuff!

I have a habit of taking too many photographs - and never doing anything with them! I'm sure many of us are guilty of just that too! So I decided to pull out some of my photos from some of the concerts I've attended and make some layouts, for this one it's from a show I attended back in 2012. I went to see the band Garbage! They had been on a 7 year hiatus as Shirley Manson, the singer pursued acting. The drummer, Butch Vig actually produced Nirvana's 'Nevermind' album... that's pretty awesome!
 
Check out my page...
 
I started by cutting strips of the 'Venetian Romance' designer series paper (each size had a variance of 1/2" so it gradually got larger. I layered my DSP strips onto some Basic Black 12 X 12 cardstock. I cut the letters with the 'Typeset Alphabet Bigz'.
 
I chose to use some of the scraps left after cutting the letters and to trim around them to make an outlined effect for the first 'G' and the second 'A'. I like how it turned out! I then stamped a bunch of 'Simply Stars' and heat embossed with Black embossing powder and hand cut each star. I popped the stars up on dimensionals.
It was an awesome concert, the show was sold out... so it was pretty crowded! I wanted to showcase the band members - the fabulous Shirley Manson, Butch Vig, Duke Erikson and Steve Marker. Now I have a great souvenir from this great show!
 
Stampin' Up! Supplies Used:
Venetian Romance Designer Series Paper [130144 - $13.50]
Typeset Alphabet Bigz [127552 - $110.95]
Simply Stars [wood: 130889 - $16.95; clear: 130892 - $13.95]

Happy Stamping :)

Wednesday, January 8, 2014

Sale-a-bration is coming soon... sneak peek!!

Hello... I feel so much better with some time to relax, and create the last couple of days - with the weather being so crummy and I've been getting over a cold, I haven't really left the house much. So what better opportunity to bundle up in my warm, snuggly pajamas, and go to my 'lady cave' - it's like a man cave, but there are no video games - just all my craft items (stamps, inks, papers, fabrics, sewing machine, beads and jewelry tools, and lots more crafty goodness!) I recently got new desks and shelving so it's nice and organized - the way I like it! Any hooooo!!

 I am really enjoying the products from the new occasions catalogue from Stampin' Up! that I've got to play with so far. I also earned several Sale-a-bration items - and with Sale-a-bration only a few weeks away, I want to share some products that will be available from January 28 - March 31! This card features 4 different products, all are FABulous!

 
This card features:
Banner Blast Stamp Set
Banner Punch
Decorative Dots Embossing Folder
See Ya Later Stamp Set
Colours used:
Pistachio Pudding, Crisp Cantaloupe, Sahara Sand and Pool Party
 
I hope you like it, stay warm and Happy Stamping :)


Tuesday, January 7, 2014

Geometrical ... love you so banner card!

Hello - It's Tuesday, and my share for today is another using the Geometrical set (you'll probably see a lot of this set from me!). I used the stamp set 'Gorgeous Grunge' from the annual catalogue with Strawberry slush ink to make the background on my 'very vanilla' card stock. 
 
 
I made 3 layers - Strawberry slush, Basic Black and Bermuda Bay. I embossed the upcoming SALE-A-BRATION embossing folder 'decorative dots' on the Bermuda Bay layer. I punched out some triangles with the coordinating punch from the 'geometrical' set and banners (another SAB item available January 28th FREE with qualifying order). I punched a few small hearts and circles to finish off my banner...

Happy Stamping :)

Monday, January 6, 2014

Cheer up.. buttercup!

Hello and Happy Monday :)

We got a bunch more snow here through the night... but at least the sun is shining! I re-organized my craft room yesterday with new shelving and desks. I finally had a bit of time to sit down and create some cards.


This card is featuring a new stamp set called 'Geometrical' - it's one of my favourite new sets. I wanted to make it like a bullseye and the arrows are pointing to the sentiment 'cheer up buttercup'... to say hurry up and get better.
 
I used the new 'arrow' embossing folder too, another favourite of mine. I chose to use the colours that coordinate with the set [Bermuda Bay, Strawberry Slush, Basic Black, Smoky Slate - the only colour I changed was the Crushed Curry]. While I do love that colour, I wanted to see how 'Summer Starfruit' would go  - and I think it blended nicely with the other colours :)
 
I have another very vibrant yellow card to share with you! I love how happy the colour yellow makes me, it's such an uplifting colour. This card features many different shades of yellow - starting with my favourite for the background 'Summer Starfruit', embossed with the 'Arrows' Textured Impressions Embossing Folder from the Occasions Catalogue. I then cut 2 circles with the circles collection framelits, one in 'Crushed Curry' and the other in 'Whisper White'. I stamped the sentiment from the 'Geometrical' stamp set, then thought it needed something more - so I took the circle stamp and inked it up with summer starfruit, crushed curry and daffodil delight stamping on and off for different variances of colour. I then stamped the buttercup flower from 'happy watercolour' and coloured it in with 'Crushed Curry' ink and cut it out with my paper snips and popped up on dimensionals and tied a piece of the Sale-a-bration Summer Starfruit Baker's Twine, which I frayed. I love it - one of my favourite cards that I've made with the new products!
 
 
Stampin' Up! Supplies Used:
Arrows TIEF [132187 - $9.95]
Happy Watercolour [wood: 133188 - $36.95; clear: 133191 - $26.95]
Geometrical [wood: 133158 - $36.95; clear: 133161 - $26.95]
Thick Baker's Twine [Sale-a-bration]
Circles Collection Framelits [130911 - $32.95]
 
I hope you like my shares, Happy Stamping :)


LinkWithin

Related Posts Plugin for WordPress, Blogger...