Thursday, September 4, 2014

Calling all heroes: Framed Art

Hello....... it's no secret that I love the Calling all heroes photopolymer stamp set! I was discussing the Avengers movie with a co-worker of mine, she really likes Loki. When I was playing with this set, I remembered that so I decided to make her a framed art piece. I made a bunch of polaroid-type images of superheroes created with the set. I added the "What's your super power?" again to the bottom, and added the "I'm a Chef!" cut with the Word Bubble Framelits above one of the images. I, of course had to add the city skyline at the bottom - I cut a portion out for some more dimension. She loved it! Have a super day :)
 

Stampin' Up! Supplies Used:
Stamps: Calling All Heroes, Photopolymer
Papers: Whisper White and Basic Black cardstock
Inks: Mossy Meadow, Early Espresso, Basic Black, Tangelo Twist, Real Red, Gumball Green, Chocolate Chip
Accessories: Stampin' Dimensionals, Paper Snips, Stampin' Trimmer

Thanks for stopping by, Happy stamping!
Beckie

Wednesday, September 3, 2014

Blooming with Happy Birthday Hope

Hi there! I have another share from my stamp class last month - which had a floral theme, hense all the pretty flowers. I used the Bloom with Hope set again (can you tell that I like this set?!) I dry embossed the poppy image which was coloured with Blendabilities. I love the contrast added with the black and white and the pop from the bright colours of Pumpkin Pie, Cherry Cobbler and Daffodil Delight! My class participants got to chose from these colours plus Coastal Cabana or Night of Navy... all of them looked stunning and they did such a great job colouring with Blendabilities for the first time - they blend so beautifully even for beginners.


Here's a closer look at the Pumpkin Pie card.

 
I decided to add the leaf stamp to the background, similarly to the one I shared yestereday but without the white gel pen outlines. I tried it with just a plain background, but it needed something - I think the leaves did the trick! I hope you like my cards.
 
 
Stampin' Up! Supplies Used:
Stamps: Bloom with Hope (hostess)
Papers: Pumpkin Pie, Daffodil Delight, Cherry Cobbler, Basic Black, Whisper White Cardstock
Inks: Tuxedo Black Memento Ink, Blendabilties Assortments: Cherry Cobbler, Pumpkin Pie, Daffodil Delight, Old Olive, Colour Lifter
Accessories: Ovals Collection Framelit Dies, Stampin' Trimmer, Stampin' DimensionalsStylus, Hexagon Punch, Crochet trim, Corner Rounder
 
Thanks for stopping by, happy stamping!
Beckie

Tuesday, September 2, 2014

Springy Floral Surprises

Hello there, I have a pretty floral card that we made at my stamp class last month to share today. I really love pop up cards, they have that fun element of surprise when you open them!! Such fun.
 
I started by stamping a bunch of flowers with the Petite Petals set and punching with the coordinating punch which makes it super quick and easy. I just got my order in when I was designing these, and I had a brand new pack of Strawberry Slush cardstock - why not, I've been trying to embrace the pink lately and I do like the shade of pink more than some of the others. I punched out two 1-3/8" circles and cut a spiral with my paper snips. I attached a mini glue dot to the center, and attached to the inside of my card base. Then I added another mini glue dot to tail end of the circle - closed my card and the spiral is perfectly placed! I repeated it for the second circle. I added my flowers with glue dots also - I put one on each side around the spiral so you have the same view from any way you look at the card. I punched a few leaf stems with the Bird punch and added some sequins from the Gold Sequin Trim.
 
 
Here's a closer look at the springy floral spirals - it really does add a fun effect to the card.
A nice surprise for the recipient. For the front of my card, I stamped the Hardwood background stamp onto a piece of Soft Suede. I then cut an oval with the Ovals Collection Framelits, I sponged the edges of both. I popped the base up with dimensionals and attached the oval cut out with Snail. I then added some more flowers and leaves and a sentiment from Sassy Salutations - I love the font in this set, very fun. I hope you like my card, and try making one for yourself!
 
 
Stampin' Up! Supplies Used:
Stamps: Petite Petals, Sassy Salutations, Flower Shop, Bloom with Hope (Hostess), Hardwood
Papers: Strawberry Slush, Perfect Plum, Daffodil Delight, Real Red, Old Olive, Wild Wasabi, Soft Suede
Inks: Black StazOn Ink, Soft Suede
Accessories: Petite Petals Punch, Extra Large Oval Punch, 1-3/8" Circle Punch, Bird Builder, PunchPansy Punch, Mini Glue dots, Stampin' Dimensionals, Paper Snips, Gold Sequin Trim, Sponge Daubers, Ovals Collection Framelit Dies, Itty Bitty Accents Punch pack, Rhinestone Basic Jewels
 
Thanks for stopping by, happy stamping!
Beckie

Monday, September 1, 2014

Outlined Stamping and a Sunny, Sparkly necklace!

Hello.... it's a holiday here in Canada - Labour Day! I'm one of the lucky one's whose work never closes, so I have to head off to work soon. My hubby is off to see the Tiger Cats play this afternoon, it's the first game at the new stadium. The construction is about 3 months behind being completed... and I think it's still not completely finished either - their section isn't done, but they gave them alternate seats for today's game. So he's excited.
 
But enough about that... I've got two pretty things to share today, one card and a pretty necklace! First let's talk about my card which features the Bloom with Hope set - love it, I bet you knew that already?! I stamped the "cosmo" image, that's what I call it since it looks like a cosmo flower. I first coloured using my Blendabilities markers, then I dry embossed around it to give a raised appearance. I watercoloured the background with some Cherry Cobbler ink, and cut with the Ovals Collection Framelits. I took a piece of the 1/4" Cotton Ribbon and coloured in a Ombre effect with my Cherry Cobbler assortment of Blendabilities. I added the ribbon to a piece of Basic Black cardstock cut at 1/2" - I added a piece of sticky strip to add my ribbon in a pleated pattern. On a piece of Cherry Cobbler cardstock, I stamped the leaf image randomly so the whole piece was covered, then outlined each leaf with the white gel pen. I finished with a sentiment from the new hostess promotion "Good Greetings" (more details about this set posted on the left side of my blog) and some gold sequin trim... I added a few more loose sequins for some added sparkle.
 
 
I also have a pretty necklace to share today that I made while trying to use up some of my beads in my stash. It features some of my favourite stones, and colours... I love oranges and brown tones - very earthy! I used some pretty Carnelian stones with sparkly orange crystals and shiny Goldstone beads! Such pretty stones, Goldstone is actually a manmade stone and has the appearance of sparkles throughout... very stunning. One of my favourites to work with. Check it out below...


Stampin' Up! Supplies Used:
Stamps: Bloom with Hope (Hostess only set), Good Greetings (Hostess Promo)
Papers: Cherry Cobbler, Basic Black, Whisper White cardstock
Inks: Memento Tuxedo Black Ink, Daffodil Delight, Old Olive & Cherry Cobbler Assortment Blendabilities
Accessories: White Gel Pen, Gold Sequin trim, Stampin' Dimensionals, Ovals Collection Framelit Dies, Aquapainter, Decorative Label Punch, Mini Glue Dots, Sticky Strip, Stampin' Trimmer
 
Thanks for stopping by, Happy stamping!
Beckie

Friday, August 29, 2014

Baby, We've Grown Blended Bunnies

Hello... I hope you've all been having a great week - I just back from camping, I feel rested - as I spept more than I usually do since there's nothing to do but relax! We usually go the same place every year, since it's never busy during the week and we like the peace and quiet. I love driving through Mennonite country since they always have fresh produce and cut flowers for sale by the side of the road - and they are always such a bargain! This time of year, Gladiolas are in full bloom, they are one of my favourite flowers, the only problem is that I have to sit with all these flowers between my feet until we get home (luckily it's a little more than an hour away). I got enough Gladiolas to make 8 bouquets and I got a pre-made bouquet and some sunflowers! My tables, desks, and counters all look so colourful and bright - I just love Glads! Enough of my ramblings about camping...
 
I hope you checked out the new holiday catalogue just released yesterday, it's pretty sweet... don't ya think?! I love it - and have purchased pretty much everything already (we'll not everything, but a lot!) now I just need some time with me, myself, and my stamps!!
 
I have a sweet share for you today featuring 'Baby, We've Grown'. I don't make too many baby cards, but I really love how this one turned out! I decided to stamp the cute bunny image 3 times, and use my blendabilities assortments of Coastal Cabana, Crumb Cake and Old Olive. I used Daffodil Delight for the bunnies tummy and bow-ties. I fussy cut them out. I embossed a piece of Night of Navy, embossed it with the Large Polka dots textured impressions embossing folder, I attached it on an angle then trimmed the excess off.. no particular reason for the placement of this layer, but I like it! I stamped the Sweet Baby by combining the 'Oh Baby' and the 'Sweet Baby' stamps and using my Night of Navy Stampin' Write marker it allows me to do so. I punched it out with my 2-1/2" Circle Punch, layered onto some circles using the Circles Collection Framelits Dies, finished by adding some Coastal Cabana Thick Baker's Twine and fraying the ends... It's no secret that I love baker's twine... so why not!?  I hope you like it, have a sweet weekend! 


Stampin' Up! Supplies Used:
Stamps: Baby, We've Grown
Papers: Whisper White, Night of Navy, Coastal Cabana, Crumb Cake, Old Olive Cardstock
Inks: Night of Navy Stampin' Write Marker, Tuxedo Black Memento Ink, Blendabilities Assortments: Coastal Cabana, Daffodil Delight, Old Olive, Crumb Cake
Accessories: Thick Baker's Twine (Coastal Cabana), Paper Piercing Tool, Stampin' Dimensionals, Rhinestone Basic Jewels, Large Polka Dot TIEF, 2-1/2" Circle Punch, Circles Collection Framelits
 
Thanks for stopping by, happy stamping!
Beckie


Wednesday, August 27, 2014

Be-YOU-tiful Notebook

I have a fun project to share today, featuring the 'Flower Patch' stamp set and coordinating framelits. I really love notebooks - I have at least 2 dozen or more for ideas, quotes, and pretty much anything that inspires me. I carry one with me at all times, as you never know when inspiration will strike?! I designed this notebook as part of my September class. I used the Grid notebooks (2 for $5.95), how's that for a deal?!! I found it quicker to stamp a bunch of flowers first, then diecut them. I actually stamped some of each of the flowers so I could diecut multiple flowers at once!

** Tip ** some of the flowers are difficult to line up to cut with framelits.  To make things simpler I put a dot with a Sharpie marker at the top of my stamp and the part of the framelit that lines up with the stamp so when I stamp I know where the top is and it makes diecutting a whole lot easier, especially for the larger stamps!

To begin, I used the Decorative Masks - either the dots or stripes, but would look great with the stars or hearts too! I used the Metallic Gold and Silver Encore inks and some sponge daubers. I layered my stamped flowers with glue dots and dimensionals, added some Linen Thread and In-colour sequins! The Be You tiful sentiment is one of my favouites from all the sets new this year - I just love it!! The inspiration for this notebook came from a sample in the Annual Catalogue, so many ideas in that book! The new holiday catalogue launches tomorrow, another book with some great ideas and inspiration! Have a super day!


Stampin' Up! Supplies Used:
Stamps: Flower Patch
Papers: Whisper White, Island Indigo cardstock
Inks: Lost Lagoon, Hello Honey, Tangelo Twist, Mossy Meadow, Real Red, Old Olive, Blackberry Bliss Classic Inks, Black StazOn, Metallic Encore inks: Silver and Gold, Versamark ink
Accessories: Sponge Daubers, In-colour sequins, Glue Dots, Linen Thread, Flower Flair Framelit Dies, Stampin' Dimensionals, Big Shot, Magnetic Platform, Decorative Masks, Crushed Curry Stampin' Emboss Powder, Heat Tool

Thanks for stopping by, happy stamping! 
Beckie

Tuesday, August 26, 2014

Good Greetings Holiday Card

I have another share today... this time with paper! We're going camping for the rest of the week and won't be posting until later this week so I'm sharing two things today. I just love camping, it always relaxes me so much! I definitely need some R&R after the busy summer I've had.
 
I have another holiday card and sneak peek for you today. I used the upcoming hostess stamp set that will be available when you host a Stampin' Up! workshop and have a qualifying party. It is such a great set with greetings for Christmas, Thanksgiving, Valentine's Day and Halloween - a few could work for other occasions too! After I made the Who is your Santa card I wanted to try another holiday card. I decided to stamp the Merry & Bright and Joy & Peace sentiments in rows (using my much loved Stamp-a-ma-jig!). It's hard to line up wood mount stamps perfectly so it's definitely a go to tool! I added a pop of colour in the center using Real Red ink for the Merry Christmas sentiment and the Peace & Joy  in the center in Mossy Meadow. To finish it all off I made some flags with random scraps of cardstock and just flagged the edges with the Hexagon Punch. I stapled them all together and adhered to my card with a dimensional and a piece of Basic Black baker's twine. I'm not going to lie, this card - because of all the stamp-a-ma-jigging... took a while, but I like how it turned out! Hope you do too.


Stampin' Up! Supplies Used:
Stamps: Good Greetings (upcoming hostess set)
Papers: Basic Black, Whisper White, Real Red, Mossy Meadow Cardstock
Inks: Black StazOn, Real Red, Mossy Meadow
Accessories: Stamp-a-ma-jig, Basic Black Baker's Twine, Stampin' Trimmer, Stampin' Dimensionals, Hexagon Punch
 
Thanks for stopping by, happy stamping!
Beckie
 

Parade of pretty, sparkly bracelets...

I have some more of my Pretty, Sparkly things to share that I've recently created! Jewelry making is another one of my beloved hobbies. Check out the parade of bracelets I've made below...
 
The first is my favourite stone, Labradorite - such a stunning stone. It's hard to tell in the photo, since there wasn't too much sun the day I took the picture, but when the light hits it it has a stunning display of colours.. so pretty!

 
Next is an Olive green Jade and crystal bracelet. I just love the shape of these beads - very modern!
 
 
I love interesting beads with fun patterns and irregularities. It makes each bead like a piece of art - even stones with flaws are beautiful. This bracelet uses Green/blue conglomerate Jasper beads and crystals in black and turquoise colours.
 
 
Next I have one I made for a co-worker using some chunky Rose Quartz beads, very pretty faceted beads. This one has some weight to it, but it's not too heavy to wear a lot.
 
 
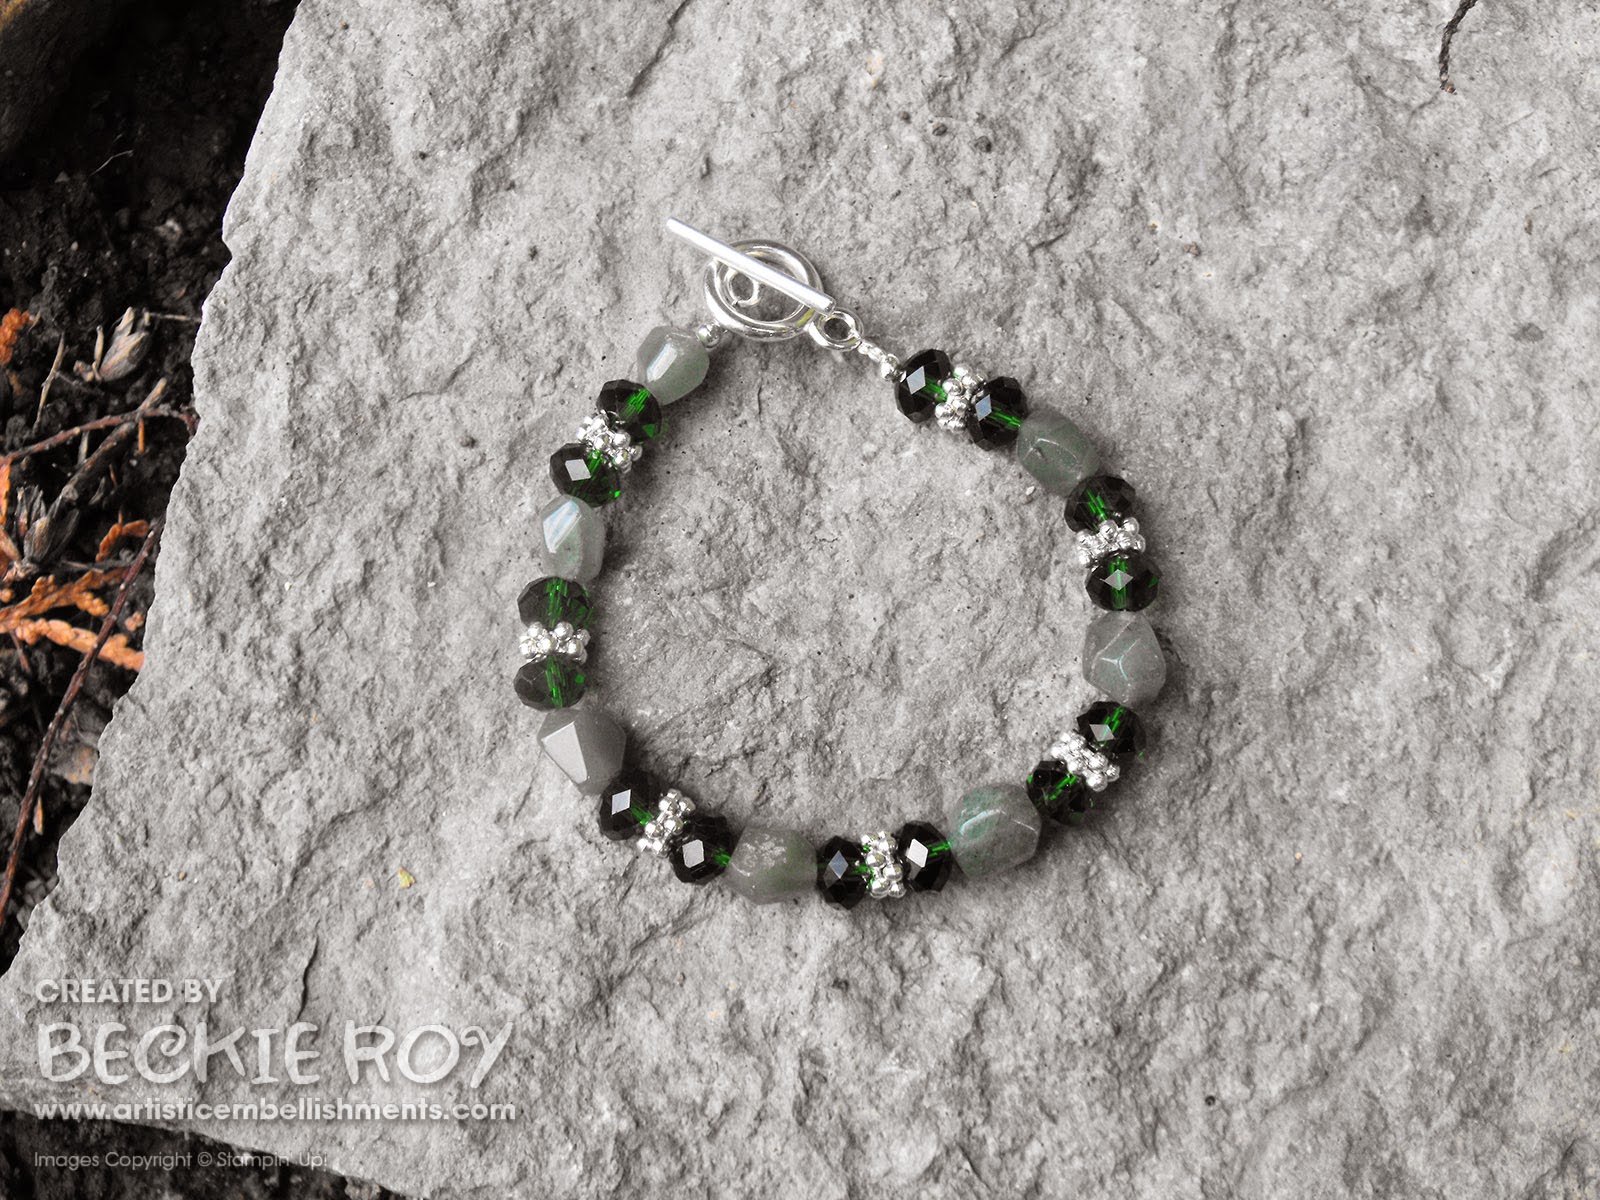
Next is a pretty green one featuring some Adventurine beads with subtle facets and some deep, rich green crystal beads. Can you tell I'm on the crytal bandwagon?!
 
 
I love Jasper, mainly because it comes in so many interesting and fun patterns. There are so many varieties of Jasper, it's hard to keep them straight some times. This bracelet is made Green matrix Jasper, turquoise and copper beads - I love the look of Turquoise with Copper.
 
 
This one uses turquoise and crystals. I love the turquoise beads, they fit together like puzzle pieces.
 

Well, thanks for looking in today... I'm sure I'll be crafting up some more sparkly things in the future! Have a super day :)

Beckie

Monday, August 25, 2014

Visions of Santa: Who is your Santa?

 
Hello..... I'm officially off for one week! I kicked it off with a concert last night! 3 amazing bands - with pretty good looking lead singers, that's never a bad thing! What an awesome show, first AFI kicked things off, then 30 Seconds to Mars followed by Linkin Park. All were great, but I really wanted to see AFI again, this was my fifth time seeing them - I'm a bit obsessed to say the least! Definitely a show to remember! I also got myself two new concert tees, in black of course!
 
Well enough of me rambling on... I finally had the chance to sit down and play with some of my new goodies. Believe it or not they've been sitting untouched for weeks, there's nothing worse than having shiny new craft supplies looking all enticing but no time to sit and play. I've been so busy with work I've had no time! I did have an hour to play the other day, and I made a couple of new things - here's a sneak peek of a card I made using the 'Visions of Santa' stamp set from the upcoming holiday catalogue (available August 28). It was the first set that I absolutely had to have... those fun dancing Santa's were just so hard to resist. I stamped the 3 Santa's (the one's in their underwear), onto Basic Black panels - I used the Alphabet rotary stamp to make my words Who is your Santa. I wish that stamp had an apostrophe and question mark, for grammar's sake! I hope you like it! 


Stampin' Up! Supplies Used:
Stamps: Visions of Santa, Alphabet Rotary
Papers: Whisper White, Cherry Cobbler, Basic Black cardstock
Inks: Black StazOn, Cherry Cobbler Assortment Blendabilities, Blushing Bride Stampin' Write Marker
Accessories: Cherry Cobbler Baker's Twine, Basic Black Baker's Twine, Paper Snips, Stampin' Dimensionals
 
Thanks for stopping by, Happy stamping!
Beckie


Thursday, August 21, 2014

Talk Nerdy to ME!

Hello... I hope you've been enjoying my geeky/nerdy shares the last few days! Today's card is actually the first card I made with these fun glasses. I stamped a bunch of glasses in a strip - one in Lost Lagoon, one in Tangelo Twist and one in Mossy Meadow... do you think I like the new in-colours? Maybe just a bit ;)
 
I added them to my Whisper White base in a step pattern with one slightly lower than the first... I used the Alphabet Rotary stamp again to make my talk nerdy to me sentiment! I think it's funny... but I'm a little bit odd!! I hope you like it :)
 

Stampin' Up! Supplies Used:
Stamps: Calling All Heroes, Alphabet Rotary
Papers: Lost Lagoon, Tangelo Twist, Mossy Meadow, Whisper White Cardstock
Inks: Lost Lagoon, Tangelo Twist, Mossy Meadow
Accessories: Paper Snips, Stampin' Dimensionals

Thanks for stopping by, happy stamping!
Beckie

Wednesday, August 20, 2014

Geek is the new SEXY

Hello...... I just got home from work - what a busy day! I plan on spending most of the evening in my stamp room as it has been neglected the last week. I really need that time for my sanity! I'm glad the rain stopped, and the sun is shining :)
 
I have another card with those fun 'nerd glasses'. I stamped a whole bunch of glasses in a variety of colours [Tangelo Twist, Blackberry Bliss, Mossy Meadow and Lost Lagoon]. I cut around the glasses to make a rectangle - then matted them onto a piece of Basic Black. I chose not to align them perfectly, I liked that look... so I went with it. I cut a starburst and added the words Geek is the new sexy using the Alphabet rotary stamp. I cut each word out and matted them onto Lost Lagoon. I added a couple pairs of glasses, fussy cut out and some Gold Sequin Trim for a bit of glitz. I hope you like it, I've got one more share tomorrow featuring these fun glasses. I hope you're not sick of them yet?!

 
Stampin' Up! Supplies Used:
Stamps: Calling All Heroes, Alphabet Rotary
Papers: Whisper White, Basic Black, Blackberry Bliss, Mossy Meadow
Inks: Lost Lagoon, Tangelo Twist, Blackberry Bliss, Mossy Meadow
Accessories: Gold Sequin Trim, Paper Snips, Stampin' Dimensionals, Glue Dots
 
Thanks for stopping by, happy stamping!
Beckie

Tuesday, August 19, 2014

Geeky Girl

Hello.. It's Tuesday, my one and only day off this week. It's a beautiful day outside, I'm going out for lunch with some friends, then I will have some time to play for a bit before my stamp class tonight.... so it's going to be a good day!
 
I've got another geeky card with those adorable glasses. This time I stamped in Basic Grey, Bermuda Bay, Lost Lagoon and Coastal Cabana - I love this colour combo! I stamped a bunch of the glasses in all four of the colours, and matted them onto matching cardstock. I used the Rotary Alphabet stamp to make my 'Geeky Girl', which I stamped three times. I finished with some thick Baker's twine in Coastal Cabana colour and a piece of vellum embossed with the large polka dot embossing folder. I've got a couple more geeky cards coming up, I hope you'll visit me again. Have a super day! 
 
 
Stampin' Up! Supplies Used:
Stamps: Calling All Heroes, Alphabet Rotary
Papers: Vellum cardstock, Whisper White, Basic Grey, Bermuda Bay, Lost Lagoon, Coastal Cabana cardstock
Inks: Basic Grey, Lost Lagoon, Coastal Cabana, Bermuda Bay
Accessories: Paper Snips, Stampin' Trimmer, Thick Baker's Twine (Coastal Cabana)

Thanks for stopping by, Happy stamping!
Beckie

Monday, August 18, 2014

Embracing my inner nerd!

Hello...it's Monday - a brand new week! I hope you all had a great weekend, I had a very busy weekend. I worked all weekend, then had my Dad's birthday on Saturday so we had him over for a BBQ, and my Mom's birthday was Sunday - so we took her an my Nana out... busy, busy. I actually managed to make a card or two also. The first time I've made something in a while, with paper that is. I've been getting back into my beading, but my first love will always be paper crafting! I have a very busy week ahead of me......... I work every day, including the weekend. I have tomorrow off and will be going for lunch with some friends from work, I will have some time to play a bit afterwards (hopefully!), followed by stamp class tomorrow evening :) So it will be a busy, but fun day! And boy do I need it, I've been working so much this summer! Can't wait for next week's vacation...
 
Onto my share, if you visited me on Friday, you would have checked out my 'geek' card! I love how it turned out, one of my favourite cards that I've made - it is definitely a one of a kind card. I have bigger plans for that card and today's card.. well, I have a bunch that I have bigger plans for - which I'll share later.
 
I used the same verse, except for the word geek, I used nerd. All these cards were inspired by those thick glasses from the Calling All Heroes set... I went to Pinterest, because lets face it - if you need to find something chances are someone has pinned it. That's where I found a bunch of fun nerdy/geeky quotes. I stamped my quote: "You say nerd like it is a bad thing!!" using the Alphabet Rotary stamp. I stamped the words, then trimmed around and matted onto either Tangelo Twist or Strawberry Slush cardstock. My glasses were stamped in rows of three pairs, one row of pink, one row of orange, pink, orange and layered them onto Basic Black! More pink - what's going on with me right?! Well, I hope you like my card... I think it's fun, and I embrace my inner nerd :)


Stampin' Up! Supplies Used:
Stamps: Calling All Heroes, Alphabet Rotary
Papers: Basic Black, Whisper White, Strawberry Slush & Tangelo Twist Cardstock
Inks: Tangelo Twist & Strawberry Slush
Accessories: Paper Snips, Stampin' Trimmer

Thanks for stopping by, happy stamping!
Beckie

Friday, August 15, 2014

You say I'm a geek like it's a bad thing!

Hello! If you've read any of my posts, you'll know that I am loving the new Calling All Heroes photopolymer stamp set. Well, one of the stamps really caught my attention - the cute nerd glasses. I love my nerd glasses, and have many, many pairs as I often forget where I put them! I'll be the first to admit that I can be a bit of a geek at times. When I was growing up, nerdiness/geekiness was frowned upon - not sure why? But I'm glad that perception has changed - when you think about the word or term 'geek', most people think about the nerdy kids from the movies or TV shows like Screech from Saved by the Bell.. if you grew up in the 90's you'll know what I mean by that reference! I don't think that is the definition today - it's about being unique and different (well, that's how I view it), and that is definitely not a bad thing!
 
I looked it up in Wikipedia, and here is the definition: the word geek is a slang term originally used to describe eccentric or non-mainstream people; in current use, the word typically connotes an expert or enthusiast or a person obsessed with a hobby or intellectual pursuit. Its meaning has evolved to connote "someone who is interested in a subject (usually intellectual or complex) for its own sake".
 
The parts that jumped out at me were of course enthusiast or person obsessed with a hobby (i.e. stamping) and someone who is interested in a subject (again i.e. stamping)..... so it's not a bad thing! No matter what you enjoy doing, as long as you're happy doing it - keep doing it! Get your 'geek' on!!
 
Geekiness: It's a fun thing! It's a great thing! So I started searching Pinterest for some fun quotes about geeks, and nerds. So today, I have a fun card - well, I'm actually going to use it for something else later but for now... it is a card! I have a bigger project in mind for these fun quotes, which I'll share another time. Check out today's project ...............
 
 
I used the new 'Blockhead Alphabet' Photopolymer set from Stampin' Up! - this is one from the Annual catalogue. It was one set that I really wanted, since I just love the font. I stamped with Black StazOn ink - some of the letters didn't stamp perfectly, I was going to re-stamp - but then thought it suited the look I was going for so I didn't change a thing! Sometimes the imperfections are perfections in disguise!
 
I stamped the quote "you say I'm a geek like it's a bad thing?!", onto Whisper White and Very Vanilla cardstock, cut out the words into rectangles and matted them onto Basic Black cardstock. I took a piece of designer series paper from the Moonlight stack, I chose the Hello Honey paper with the grid lines since it looks like graph paper, and punched a strip of Basic Black with the Spiral Border punch. I randomly added my words, overlapping, angled, it didn't really matter so much as I wanted it to look a bit messy - I added some vellum triangles over the letter "A's" and a Rhinestone Basic Jewel to each one, no particular reason.. I just wanted some sparkle! I added a few pairs of thick rimmed glasses (like the one's I wear!) from the Calling All Heroes stamp set, another Photopolymer set but one available online. I just love that set - so versatile!!!!! To finish I added some drops of Silver Metallic Encore Refill ... I think it looks like drops of solder you would use in shop class with metals - I was going with the whole school feel for this project - I'm happy with it. And I'm proud to be a GEEK!
 
Stampin' Up! Supplies Used:
Stamps: Blockhead Alphabet, Calling All Heroes
Papers: Moonlight DSPS, Whisper White, Very Vanilla, Basic Black cardstock
Inks: Black StazOn, Silver Metallic Encore Refill
Accessories: Paper Snips, Stampin' Trimmer, Dimensionals, Triangle Punch, Rhinestone Basic Jewels, Spiral Border Punch
 
Thanks for stopping by, happy stamping!
Beckie

Thursday, August 14, 2014

Little Letters - YOU rock!

 
Good Morning! If you know me you are going to be shocked by what you're about to see!!! A card made with PINK!! I know, I told myself a while ago I would embrace the pinks - so here's another attempt. I bought a bunch of designer series paper while they were on special in July (buy 3, get one free!) and I just loved the bold and geometric patterns in the Confetti Celebration pack. I decided to go with the pink one, since I really liked the patterns. I cut diagonal strips - almost like long triangles and adhered to a piece of whisper white cardstock, I did leave slight gaps to have the white peek through.


I cut the word 'YOU' with the Little Letters dies (the very first thing I knew I had to have - and they were the very first thing I ordered too!!) - love them! I cut my stencil on vellum cardstock and matted over a piece of strawberry slush cardstock - the ends are flagged with my baby, Mr. Hexagon punch! I took a piece of the Tea Lace Doilies and cut one into a 1/4 of the size and embossed with versamark and gold embossing powder and heat set! I popped up my YOU banner with dimensionals and added a small heart with a rhinestone jewel - coloured with blendabilities (I actually used the lightest Cherry Cobbler marker!)
 
I layered my designer paper piece onto basic black, then strawberry slush. I stapled two pieces of ribbon - a piece of 1/8" Silver and gold... so silky and smooth. I curled the ribbon and to keep it in place, added a pink heart with another rhinestone. The ROCK was made with the Alphabet rotary stamp.
 
With all this pink going on I think this card will get a bunch of winks ;)  ;)  ;)
I hope you like it - I think I'll have to embrace the pink more often, as I love how it turned out!


Stampin' Up! Supplies Used:
Stamps: Alphabet Rotary stamp
Papers: Confetti Celebration Designer series paper, Whisper White, Basic Black, Strawberry Slush cardstock, Vellum cardstock
Inks: Black StazOn, Cherry Cobbler Assortment Blendabilities Markers
Accessories: Stampin' Trimmer, Stampin' Dimensionals, Rhinestone Basic Jewels, Itty Bitty Accents Punch Pack, Little Letters Thinlet Dies, 1/8" Gold Ribbon, 1/8" Silver Ribbon, Tea Lace Doilies, Hexagon Punch ( Stapler, non-Stampin' Up!)

Thanks for stopping by, Happy stamping!
Beckie

Wednesday, August 13, 2014

Little Lettered Pretty Striped THANKS

Hello........ do you know what today is?? It's International Left Hander's Day! Since I'm a Leftie, I get to celebrate... yay! Have a great one to all you Leftie's & Southpaw's today - embrace the smudges on the sides of your hands. I'm proud to be left-handed, which means I'm in my right mind... well, sometimes ;)
 
Onto my share for today........ I had the idea for this card a while back, but finally sat down to play and it worked out just as I'd wanted it to! I love when ideas work out just as I imagine them too! I used some of the striped papers from the Moonlight Designer Series Paper Stacks, and cut them into 1" and 1/2" strips. I layered my strips onto a piece of Basic Black, matted onto Blackberry Bliss cardstock - it's hard to tell since they are both dark colours. I lined up all my stripes so the matched - and look like the stripe turns from Blackberry Bliss to Hello Honey... I trimmed the excess off once the stripes were aligned. I cut out my thanks using the Little Letters Dies, and used the void/stencil part of the word (I kept the letters to use for another project, gotta love the multi-use of these diecut letters!). I added it to the bottom over the Hello Honey stripes, since Blackberry Bliss is so dark, it would be easier to see over the yellow colour. To finish I added some tiny punched flowers with a Rhinestone in each center.
 
 
Stampin' Up! Products Used:
Stamps: None
Papers: Moonlight Designer Series Paper Stack, Whisper White, Basic Black, Hello Honey & Blackberry Bliss Cardstock
Inks: None
Accessories: Itty Bitty Accents Punch Pack, Rhinestone Basic Jewels, Little Letters Thinlits Dies, Stampin' Trimmer
 
Thanks for stopping by, happy stamping!
Beckie

Tuesday, August 12, 2014

Blended Backgrounds


Hello and good morning... ah, finally a day off!! But a busy day it's going to be. I have a craft show tomorrow and I have lots of last minute things to finish up - always the procrastinator! I made a ton of popcorn... well, not a ton in weight, just a lot - I made some concoctions up, peanut butter marshmallow, key lime pie with coconut and turtles flavoured chocolate popcorn!!!!!!!! So yummy :)

Anyhoo... I have two cards to share today. I actually got the idea for this fun background from one of the Stampin' Up! 2013 Artisan Design Team members, Connie Collins - I just love all her designs. She had a post about the Little Black Dress of Designer Series Paper, using the Back to Black DSP. I loved the idea, just wish I'd though of it! What a great way to customize any project and the papers have such fun and bold patterns.

I cut a piece, I used the same pattern since it was easy to colour - I used the Night of Navy assortment to colour the white spaces in an ombre effect. I stamped the thanks 3 times in Night of Navy and punched out and matted onto the Label Bracket Punch - I also used a piece of 1/4" Cotton ribbon, coloured with the Blendabilities for perfect coordination........ love, love the blendabilities - they are so much more than markers for colouring!

For my next card, I used the Crumb Cake assortment, except for the punches I swapped for the Hexagon rather than the circle for a different look! Besides, who doesn't love the hexagon punch?!! I love it! The blendabilities really do add a great effect to a once white background - I'm sure the black and white would have looked great too!
Here are both cards, side by side looking all handsome in their new clothes! I hope you like my shares, and thanks Connie for the fabulous inspiration :)
 
Stampin' Up! Supplies Used:
Stamps: A Happy Hooray
Papers: Back to Black DSP, Crumb Cake, Whisper White, Night of Navy, Basic Black Cardstock
Inks: Night of Navy, Crumb Cake, Blendabilities assortments: Night of Navy and Crumb Cake
AccessoriesHexagon Punch, 1-1/4" Circle Punch, Label Bracket Punch, 1-3/8" Circle Punch, 1/4" Cotton Ribbon
 
Thanks for stopping by, happy stamping!
Beckie

Monday, August 11, 2014

Pretty, sparkly things!


Hello....... two posts in one day!!! WHAT!!!! This is a non-stamping related share, but a hobby that I love.

I love gemstones, I have been an avid gem and mineral collector since I was in middle school. I started to make jewelry years ago, nothing too fancy - but I think they're pretty?!!

I thought I'd show off some of the pretty things I've been busy with lately!! I love bracelets - and bright colours and I'm completely in love with all the blue, and bluey (not sure if that's a word?!) tones... like Stampin' Up!s Bermuda Bay, Coastal Cabana, Tempting Turquoise, Pool Party, Island Indigo, Lost Lagoon... such lovely tones. It's funny, when I became a demonstrator a year or so ago all colours were just colours. Now they are referred to by Stampin' Up! colour families... my husband thinks it's funny and that I'm weird, maybe I am.. I call it unique! My living room is a lovely Bermuda Bay colour, not whatever it really is... things like that! Well, here are a few of the things I crafted up, a bunch of bracelets and some necklaces... I made more, but here are some to show off.
 
The march of the bracelets...
Some pretty, sparkly crystals, Turquoise, Bronzite... oh so pretty!!
More sparkly crystals (they are really popular right now), with some Zebra Jasper
Blue Lace Agate, oh and more crystals...

 
Impression Stone Jasper, oh so pretty colours (lost lagoon?!) and more crystals
My favourite stone... Labradorite - can be found in Canada too!! This picture really doesn't do it justice, when the light hits it just right you can see a fun display of blues, yellows, greens and purples... I just love this stone!
 This one is really simple, but it's bright orange and has sparkly crystals... what's not to like?


Now for the parade of necklaces... 
Some sponge coral, and crystals
Crackled Quartz and Mother of Pearl Shells
This one is made of glass beads, but three different lovely shades of blue (like an ombre effect) with a couple of crystals - well, just because! 
Some Mother of Pearl shell beads, and more crystals... 
Smoky Quartz, AB crystals in black and grey tones with some Black Onyx with Pyrite infused...  very pretty stones! 
Chinese turquoise with Mother of Pearl shells - I love the turquoise with the grey tones, very calming.
 
I hope you've enjoyed looking at some of my creations (non-stamping!).... As you can tell, I get bored easily... hense all the hobbies! Enjoy your day - I've got some more playtime before work!!
 
Thanks for stopping by!
Beckie

Super Thanks! Calling All Heroes

 
Happy Monday?! Well, it's happy for me since my 3 orders arrive today - yes, I ordered A LOT of stuff!!! But I need it all... so it's okay, right??! I've been busy prepping for a Jewelry/card show I have on Wednesday, I've been crafting up lots of pretty, sparkly things!!
 
Today I have another fun card with the Calling All Heroes set. If you follow me on Facebook, you may have noticed this card already? I thought I'd post to my blog also. This time I made a superhero with a red mask and stamped the same image 9 times - to fill the entire card front (with the exception for the space at the bottom for my sentiment!). I layered my heroes onto Basic Black, then Crushed Curry cardstock with a base of Real Red - then used the letters from the set to make the sentiment SUPER THANKS!. I know I've said it before, and I'm sure I'll say it again...... I love this set! I hope you do to, since I will most likely have more creations with it - so stay tuned!!


Stampin' Up! Supplies Used:
Stamps: Calling All Heroes (photopolymer)
Papers: Real Red, Crushed Curry, Basic Black and Whisper White Cardstock
Inks: Real Red, Black StazOn
Accessories: Stampin' Trimmer
 
Thanks for stopping by, happy stamping!
Beckie

LinkWithin

Related Posts Plugin for WordPress, Blogger...