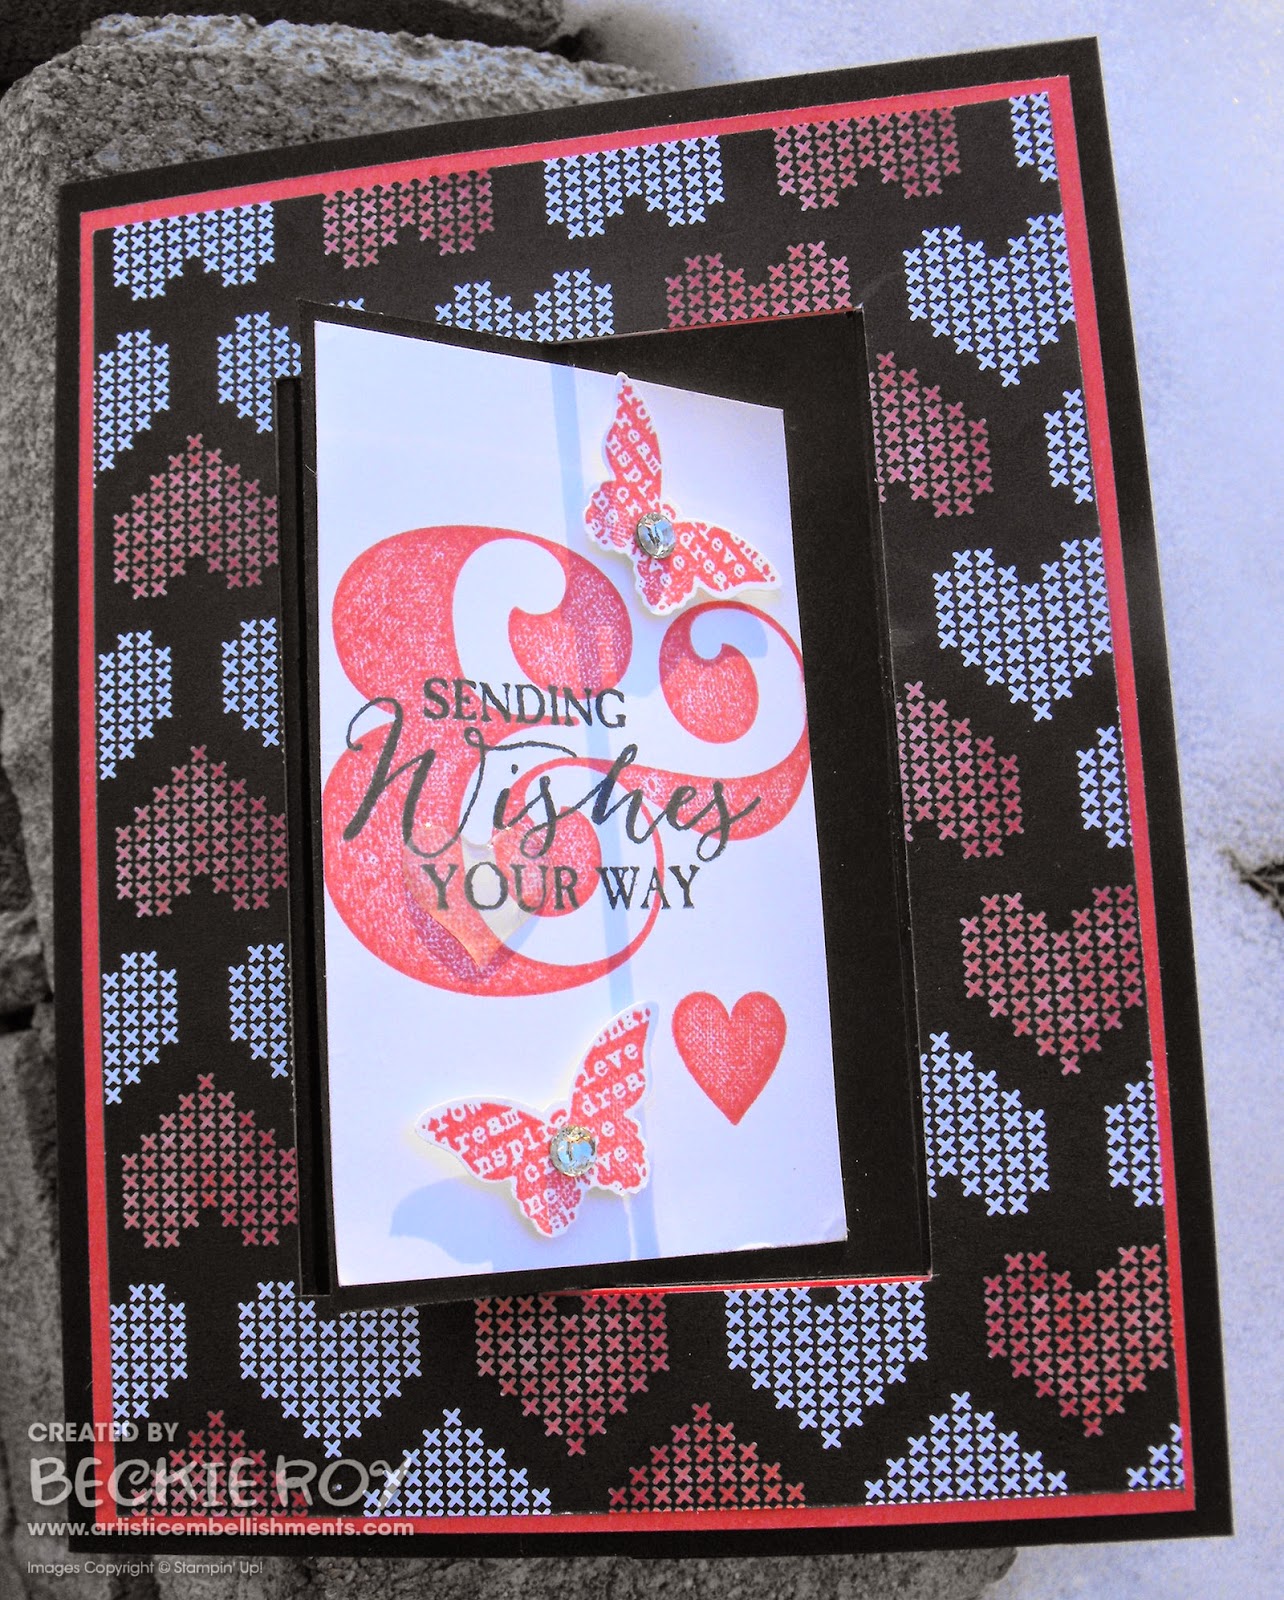
Hi there stampers! Happy Monday - I've got a fun tutorial to share with you today... it's called a Lever Card. I decided to make one of these fun cards for my hubby for Valentine's Day. I know Valentine's Day is over, but it could work for an Anniversary or Birthday too - or just change the paper and stamps and make it any occasion you want!
I used my newest obsession the Stacked with Love Designer Series Paper to decorate my card front. I decided to colour some with the Calypso Coral Assortment of Blendabilities Markers to add a bit of colour to the otherwise black and white paper. Although it is very beautiful in black and white also.
Lever Card Instructions:
First you will need a piece of 8-1/2" X 11" cardstock, whichever colour you desire - I used Basic Black.
Cut your cardstock in half at 5-1/2".
Take one piece of your 5-1/2" X 8-1/2" cardstock and score at 4-1/4". Set aside.
Take your second piece of 5-1/2" X 8-1/2" cardstock and score at 4-1/4" & 6-3/8".
Take the first piece you scored only once, line up one end at 7-1/2" in your Stampin' Trimmer and cut from 1" to 4-1/2".
Flip card over and line up at 3-1/4" and cut from 1" to 4-1/2".
Make a cut from the first cut to the second to make a window as shown below.
Now, we're going to work with the second piece of 8-1/2" X 5-1/2" with the 4-1/4" & 6-3/8" score lines. Score opposite end at 2-1/8", up 1" on each end.
Line up your piece with one end at 7-1/2", like you did on the first piece. Note: The end with the partial score lines will be the end you cut on - cut from 1" to 4-1/2".
Next, cut from the line you just made up to the score line (2-1/8" score line) - like shown below:
That's all the cutting required for your base. You will only need to cut again if you want to add multiple layers, such as designer series paper or more cardstock. You can see below how the card will be assembled to create the lever mechanism.
Add some double-sided adhesive tape of your choice (something stronger than snail). Sticky Strip, Score tape, Fast Fuse, Tombo Multipurpose Glue. Note: If you use Tombo, you will have to hold your layers together until they are secured. Attach one side (end) at a time with whichever adhesive you choose.
Add tape/glue to the same side of your layer with the lever mechanism like shown below.
Attach your tape to the second piece like shown below.
Starting with one end at a time, try to get the ends to match exactly before removing the tape lining and press to seal. The lever should go into the window hole easily.
Once your base pieces are assembled, you can decorate your card as desired. I cut my layers 7/8" smaller than the base to allow some of the black to show through.
For the front layer around the window, I cut the same way as I did for the card base, but cut 7/8" smaller around the entire piece to have a nice mat. The inside layers measure: 2" X 5-3/8" - you will need 2 pieces.
Here is what your finished card will look like from the top of the card. It might be cute to add some paper flower popping up from the middle?! The card stands up very nicely, to be shown off.
To decorate my card I used my favourite piece of designer series paper from the Stacked with Love Designer Series Paper Stack - I love those fun hearts, my favourite design from that paper stack. I decided to go with Calypso Coral with my Basic Black, instead of the traditional red coloured Valentine. I'm really loving the coral lately. I used my Calypso Coral Blendabilities Markers to colour in some of the hearts. Then I used that awesome ampersand from the You Plus Me stamp set, along with the Be Mine on the inside of my card. I added some butterflies from the Butterfly Basics stamp set, which the senitment on the front (lever) is also from.
It's hard to see, but as a finishing touch I added a heart from the 'Itty Bitty Accents Epoxy Stickers' over the YOU in Sending Wishes "Your" way. I thought it was a nice touch.
Below is another view of the card opened up.
I hope you like my card, if you have any questions please let me know!
Stampin' Up! Supplies Used:
Stamps: You Plus Me, Butterfly Basics
Papers: Stacked with Love Designer Series Paper, Basic Black, Whisper White and Calypso Coral Cardstock
Inks: Calypso Coral Classic Ink, Tuxedo Black Memento Ink, Calypso Coral Assortment Blendabilities Markers
Accessories: Stampin' Trimmer, Stampin' Dimensionals, Bitty Butterfly Punch, Simply Scored Scoring Tool, Simply Scored Stylus, Rhinestone Basic Jewels, Itty Bitty Accents Epoxy Stickers, Stacked with Love Designer Washi Tape
Thanks for stopping by, happy stamping!
Beckie


No comments:
Post a Comment